How to put a password on a USB flash drive: 5 working ways
Educational Program Technologies / / December 29, 2020
Various data protection options for Windows, macOS and Linux, as well as cross-platform solutions.
1. BitLocker on Windows
- Suitable for: Windows PC owners.
- Benefits: ease of use.
- Disadvantages: available only in the maximum and corporate versions of the OS.
How it works
The standard encryption feature has been around since Windows Vista. It allows you to encrypt the contents of any disk and provides access to it only after entering a password. However, there is one caveat: BitLocker is missing in basic editions Windows.
How to set a password
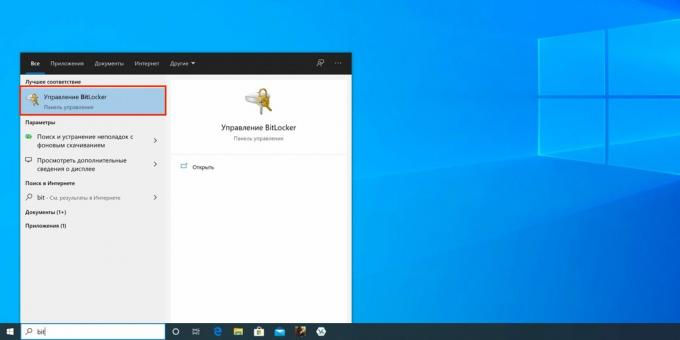
Find BitLocker through search and open.
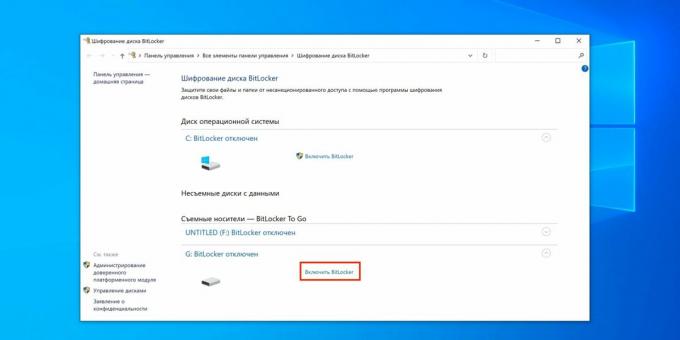
Click Turn on BitLocker next to the desired drive in the list.
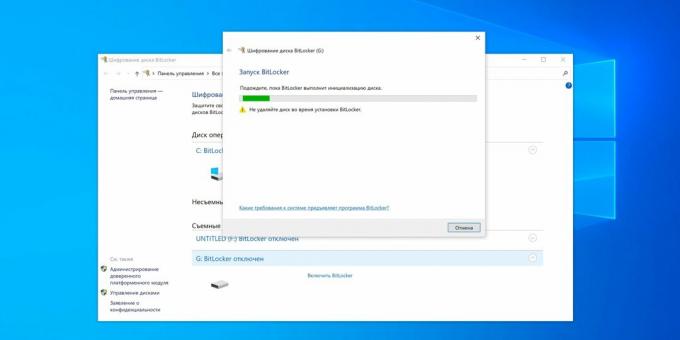
Wait for the initialization process to complete.
Check the "Use a password to unlock the disk" item, enter the code combination twice and click "Next".

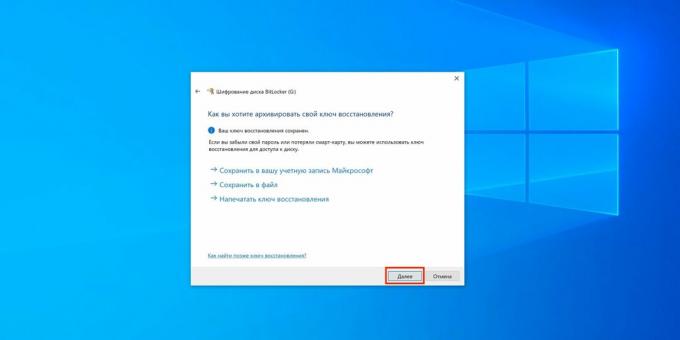
Select one of the options for backing up the recovery key and click Next.

Specify the desired storage location for the key and click "Save".

Click Next again.
Select "Encrypt Used Space Only" if the drive is new, or "Encrypt whole disk ”- if it already contains files. Click Next.

Check "Compatibility Mode" and click "Next" again.
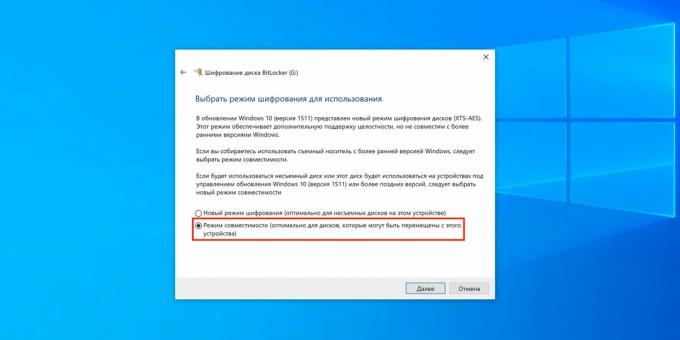
Click on "Start Encryption".
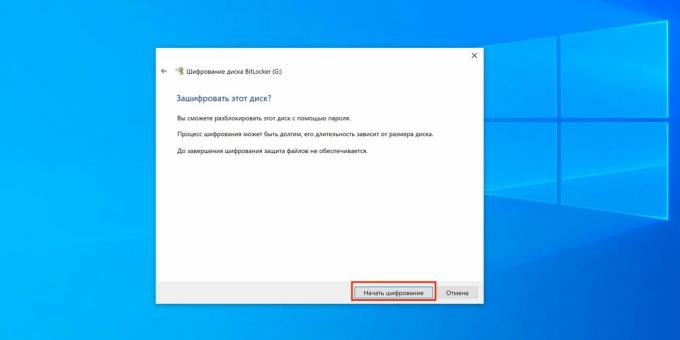
Wait for the process to finish. If necessary, it can be paused using the "Pause" button.

Now, when you connect a flash drive, a notification will appear that the disk is encrypted. Click on it to unlock.

Enter the password in the window that opens and click "Unblock".

The flash drive will now appear in Explorer.

2. Archive password
- Suitable for: those who do not want to bother too much.
- Benefits: works in any OS.
- Disadvantages: a compromise option.
How it works
Not quite a complete solution, which nevertheless has the right to life and is quite effective for a small number of files. Instead of encrypting the entire disk, you can use the ability to set a password for the archive, which is available in any archiver, for example WinRAR. In this case, archived folder with the necessary files, which are extracted only when you enter the code combination. At the end of the work, a password-protected archive is created again, and the original folder with files is deleted.
How to set a password
Select the folder for which you want to set the password and call the context menu.
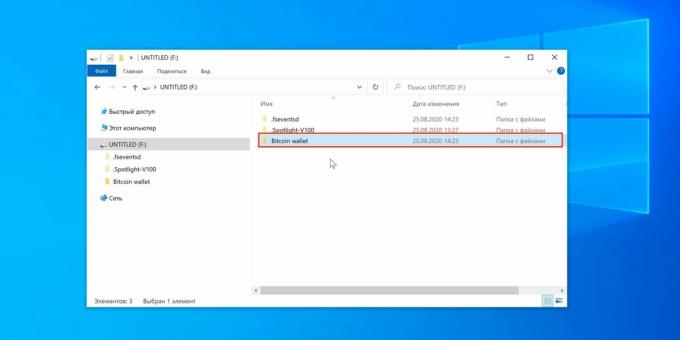
Select "Add to Archive".

Specify the desired archive parameters and click "Set Password".

Enter the password twice and click "OK".

Click "OK" again.
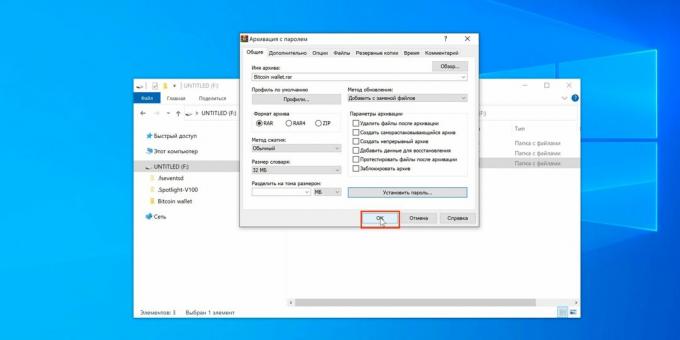
Wait for the backup to complete.

Now, when you try to extract files, you will need to enter the previously set password. You can view the contents of the archive without an access code.

3. Disk Utility in macOS
- Suitable for: Mac users.
- Benefits: Apple branded solution, ease of use.
- Disadvantages: cannot be applied for flash drives with files, only for formatted device.
How it works
Starting with High Sierra, macOS has the ability to format disks to the APFS file system, which allows the use of encryption and, accordingly, opens access to the contents of the disk only after entering password. This is a standard feature, so it is highly stable and simple.
How to set a password
Open Disk Utility via Spotlight or from the Applications folder → Utilities. Click on the "View" icon and select "Show all devices".

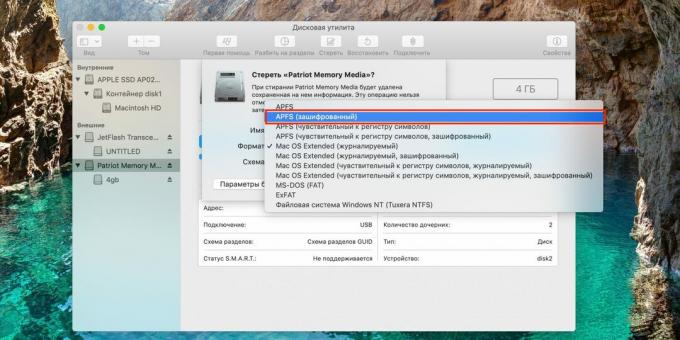
Highlight the drive in the list on the right, click "Erase" and in the "Partition scheme" item select "GUID Partition Scheme".

Now in the drop-down menu "Format" select "APFS (encrypted)".
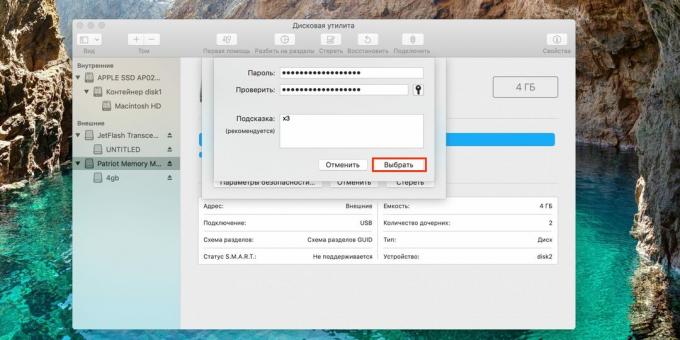
Set a password, add a hint and click "Select".
Change the disk name if necessary and click "Erase".

Wait for all changes to be applied.
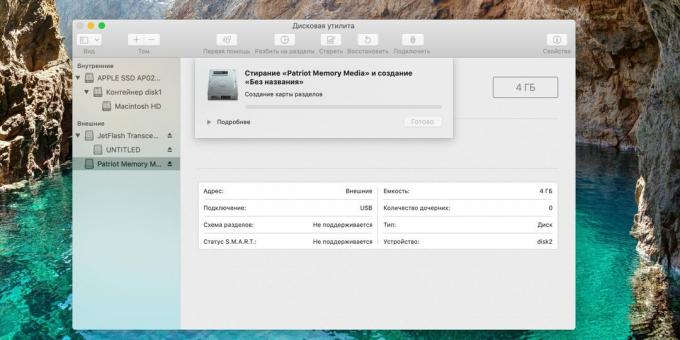
When the process is complete, click Finish.

Now, every time you connect a flash drive to your Mac, you will be prompted to enter the unlock code. Enter the password and click "Remove protection".
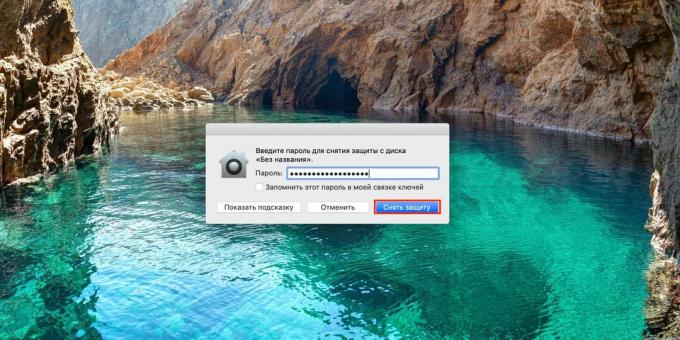
The drive will then appear in Finder.

4. Disks utility in Linux
- Suitable for: Linux PC owners.
- Benefits: ease of use.
- Disadvantages: cannot be used for a flash drive with files, only for a formatted device.
How it works
In modern Linux distributions there is an analogue of BitLocker and disk encryption in APFS. The function works in the same way: after configuration, the USB flash drive can be viewed only after entering the password. It is important not to forget it, because an encrypted disk cannot be formatted without it. Of course, after setting the password, the flash drive will work only with Linux, and it will not be recognized in other operating systems.
How to set a password
Open the standard "Disks" utility through the search.

Select your USB stick in the side menu and press the minus sign to delete the partition. Please note that all content will be destroyed! Save important files first if necessary.

Click "Delete" to confirm.

Now create a new section by clicking the plus sign.

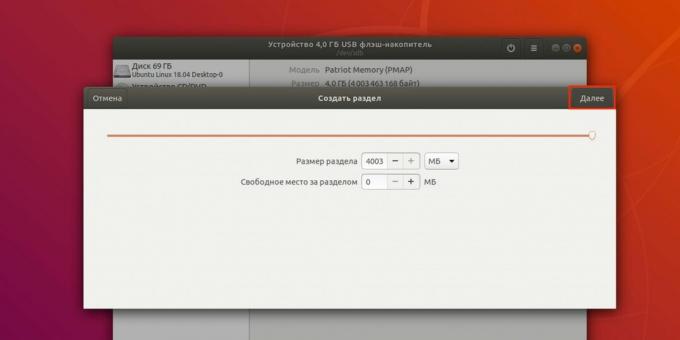
Specify the size of the section and click "Next".
Select the type "Internal disk for use only with Linux systems (Ext4)" and check the box next to "Password protected volume (LUKS)". Click Next.

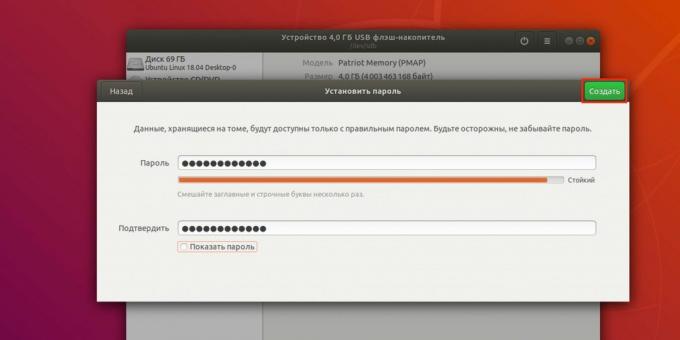
Set a password and repeat it, and then click "Create".
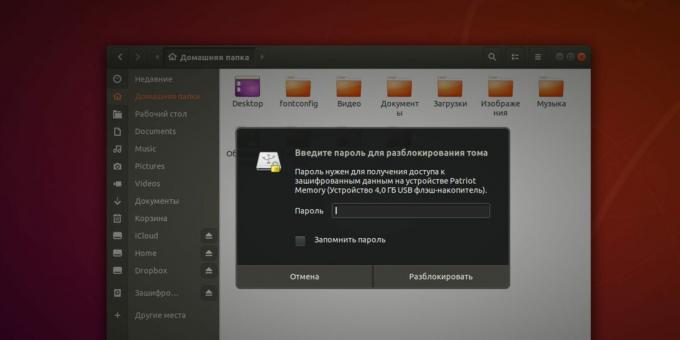
Now, when connecting a flash drive, the system will prompt you to enter a code combination for unlocking disk.
5. VeraCrypt application
- Suitable for: for those who need maximum compatibility.
- Benefits: work in any OS.
- Disadvantages: relative complexity.
How it works
VeraCrypt, one of the most popular free disk encryption applications, allows you to provide many different lock settings. It can create separate secure containers and fully encrypt selected drives. To unlock and connect such a disk to the file system, you will need to enter a password. At the same time, due to the availability of versions for different platforms, the flash drive can be locked on one computer, and read on any other with VeraCrypt installed.
How to set a password
Download the app by this link and install. Open VeraCrypt and click Create Volume.

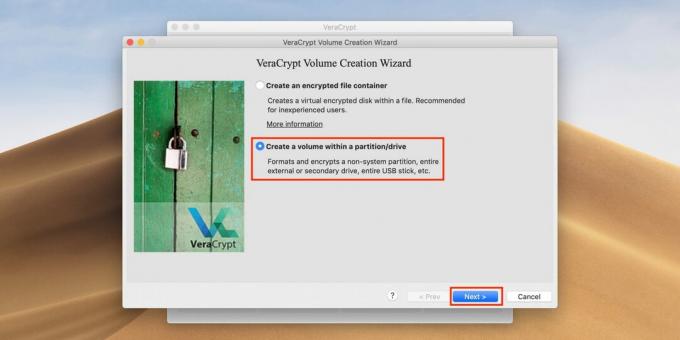
Select the Create a volume within a partition / drive option and click Next.
Next, check Standard VeraCrypt volume and click Next.

Enter the password for the account (user or administrator) to continue and click OK.

Find your USB flash drive in the list by size and name, and then click OK.

Click Next again.

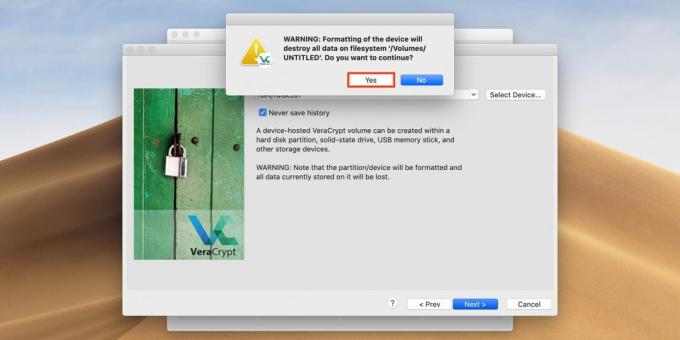
Confirm the selected settings by clicking on the Yes button.

Click Yes again to confirm formatting the disk. Keep in mind that everything files on it will be deleted!
Select an encryption algorithm. You can leave the default AES. Then click Next.

Enter the password to unlock the flash drive and click Next.

Choose the first option if you are not going to store files larger than 4 GB on the flash drive, or the second if you plan to. Click Next again.

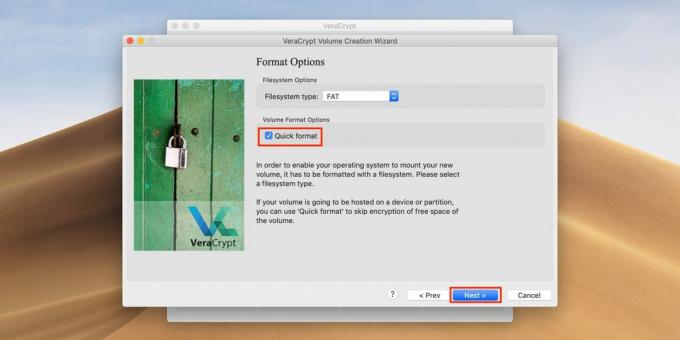
Check the box next to Quick format for quick formatting and click Next.
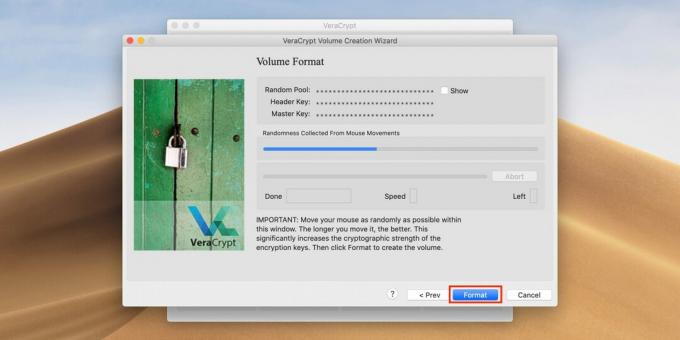
Move mouse inside the program window until the progress bar is full, and click Format.
Click Yes to confirm the deletion of the disc contents.

When finished, click OK.

Now click Exit to exit the disk creation interface. Everything is ready.

To unlock the flash drive, open VeraCrypt and click Select Device.

Find the drive in the list and click OK.

In the main application window, click the Mount button.
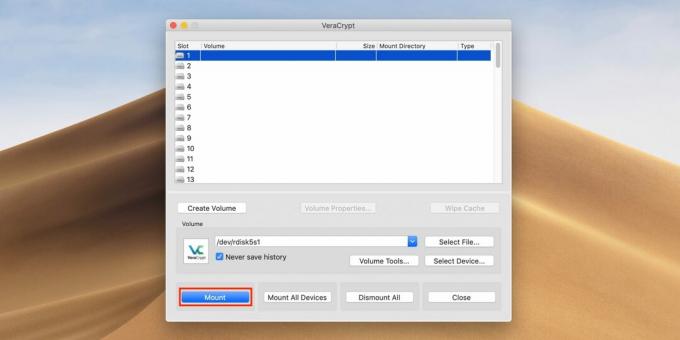
Enter the password to unlock the flash drive and click OK. It will now connect to the system and appear in the file manager.

When you are finished working with the flash drive, launch VeraCrypt, select the disk and click Dismount to disable

Read also🖥💿🔑
- "The file is too large": what to do if the data is not written to the USB flash drive
- How to format a USB flash drive in Windows or macOS
- 6 reasons not to save passwords in your browser
- How to protect personal data on the Internet
- How to set a really strong security password on iPhone and iPad


