How to cut thuja and when to do it
Miscellaneous / / August 11, 2023
An easy way to save on seedlings.
When to cut thuja
The procedure can be carried out four times a year:
- In February, despite the snow and frost. At this time, active sap flow processes begin in the plant.
- From the end of March to the end of April, when the thuja begins to grow intensively.
- In June, when the plant stops growing shoots.
- From mid-August to early October, when the plant slows down the vegetation process. The main thing is to have time before the arrival of autumn frosts.
Please note that when cutting thuja in winter, spring and early summer, you will receive rooted seedlings in a few months and will be able to plant them in the ground before the onset of cold weather. If you carry out the procedure from mid-August to early October, you will have to leave the coniferous pot for wintering at room conditions in order to plant it on the site next spring.
How to prepare thuja cuttings
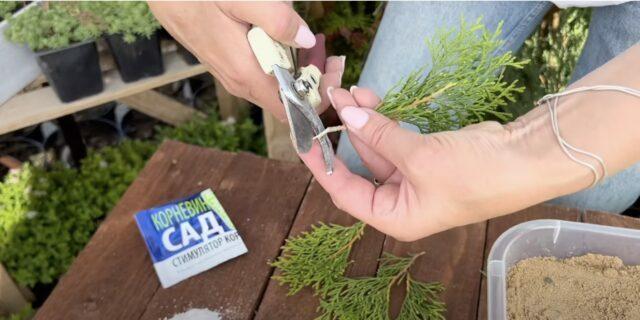
Choose a strong, healthy and well developed plant. At the top of the bush, find young twigs covered with hard brown wood. Their length should be about 10-15 cm. Grasp the needles firmly with your hand and separate the stalk from the trunk with a sharp and quick downward movement.
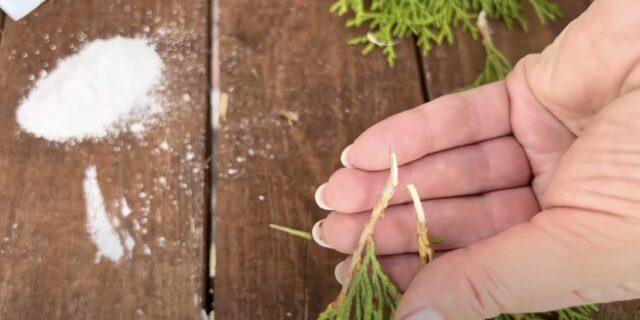
The stalk should break off with the so-called heel - a small piece of bark.
If the “heel” is too long, shorten it with pruning shears. The optimal length of the rest of the bark is no more than 1 cm.

1 / 0
Frame: Madeira Garden Center / YouTube

2 / 0
Frame: Madeira Garden Center / YouTube
Remove the lower branches at the base of the cutting to free the shoot from the needles by about 2-3 cm.
harvest cuttings needed immediately before rooting. Torn branches after long-term storage simply will not take root. If for some reason you cannot start the procedure immediately, wrap the branches with a damp cloth and put them in a dark, cool place for no more than 1-2 hours.
How to cut thuja
For rooting shoots, plastic cups or pots with a volume of about 500 ml are suitable. Try to choose a transparent container - it will be easier to see that the thuja has taken root. Make sure there are holes at the bottom of the container to drain excess moisture.
At the bottom of the cup, put drainage in a layer of 2-3 cm. For example, expanded clay, sand, small stones or pieces of foam. Then fill the containers with a mixture of sand and peat in a ratio of 1: 1, without adding about 1 cm from the edge. Thoroughly tamp the soil with your fingers.
Dip the tip of the cutting into a rooting stimulator - for example, Kornevin powder.
Insert the cutting into the soil in the center of the cup at a 45 degree angle. It is necessary to deepen the branch no more than 3 cm. Firm the soil around the shoot with your fingers.
Sprinkle the stalk with plenty of water so that the soil in the cup is moistened from top to bottom. Cover the container with the handle with a clear cup, bag, or the top of a plastic bottle.
Place the mini-greenhouse in a bright place, protected from direct sunlight. The optimum temperature for rooting thuja is 20-25 degrees.
How to care for a thuja cutting
The soil in the greenhouse with the cutting should always be moist, so check the soil regularly and water as needed.
On average, the process of rooting coniferous branches takes about 2 months. When the soil in the cup begins to braid the roots, you can plant small thujas in open ground. On how to do it right read in our material.
If you cut the plant at the end of the season (from mid-August to October), leave it to winter in room conditions at a temperature of 18–22 degrees and water regularly as the soil dries. It will be possible to plant thuja on the site in April.
Read also🌱🌺🌱
- How to cut a hydrangea correctly
- How to prune a petunia
- How to plant a rose
- When to transplant peonies and how to divide them

