05/01/2021

All about how to use keyboard shortcuts, and utility "Screenshot" and customize the look and where to save screenshots.
Press the Shift + Command + 3 keys. File is saved on your desktop as a PNG-image. This is the standard version of the screenshot, the same as pressing the Print Screen key on a PC running Windows.

use keyboard shortcut Shift + Command + 4. The cursor will change the icon of the sight with which you want to select the desired portion of the screen. As soon as you lift your finger, the screenshot will continue.
The selected area can be modified with additional keys (push them after screen selection):
Esc cancels the selection.
Use a combination of Shift + Command + 4, then press the space bar and use the cursor to select the desired window.
To take a screenshot of the on-screen menu or dock, press Shift + Command + 4, followed by a space. This combination works on the same principle as the previous one.
If you press the space bar to hold the Command key, you can select not only the menu, but some of its elements.
Press the keys Shift + Command + 6. As usual screenshots, screenshot Touch Bar will appear on your desktop as a PNG-file.
IN macOS Mojave Apple has updated the utility "Screenshot". Now it can be caused by a combination of keys Shift + Command + 5 and do the above screenshots via the application toolbar buttons. After selecting the screenshot you have to press "Snapshot" and the screenshot will remain on the desktop.
The first button is responsible for a snapshot of the entire screen, and the second - for a screenshot of the window, and the third - for a snapshot of the selected area.
Also, the application has the opportunity to video recording. The fourth button on the toolbar starts recording the entire screen, and the fifth - just the selected area.
Wherever you have made changes, they will apply to all the screenshots: and those that are removed by using hot keys, and for those that are made in the utility "Screenshot".
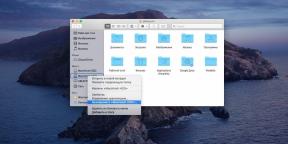
To screenshots do not clutter up the desktop, you can change the location to save them. For example, in the Screenshots folder in "Documents". To do this, create the desired folder, if it does not yet have, and type in "terminal"This command:
defaults write com.apple.screencapture location ~ / Documents / Screenshots && killall SystemUIServer
To return to the default settings, type:
defaults write com.apple.screencapture location ~ / Desktop / && killall SystemUIServer
PNG provides maximum image quality, but the screenshots are pretty much weigh. You can change the format of a regular JPG if necessary. To do this, simply enter the following command:
defaults write com.apple.screencapture type jpg && killall SystemUIServer
To return to the PNG-format, use the following command:
defaults write com.apple.screencapture type png && killall SystemUIServer
Default macOS add to the screenshots of the shadow windows. They look just as beautiful as in the system, but it is not always necessary. To disable shadows, type in "Terminal" the following command:
defaults write com.apple.screencapture disable-shadow -bool true && killall SystemUIServer
Return the shade, you can use this command:
defaults delete com.apple.screencapture disable-shadow && killall SystemUIServer
On the toolbar, click the menu "Options".
Here is given a choice to save space, a picture with a delay of 5 and 10 seconds, and the cursor display options remembering the last shooting mode or disable floating thumbnails that appear after removal screenshot.

