How to make a tandoor with your own hands
Miscellaneous / / August 07, 2021
Five oven options that will allow you to cook delicious cakes, barbecue, pilaf and a lot of other dishes.
What is important to know
About the tandoor in general
Tandoor is a vertical oven-brazier in the form of a dome or a jug with a lid. She comes from Central and Central Asia. Due to its unique qualities, the tandoor has earned popularity all over the world. You can cook a wide variety of food in it: meat, poultry, game, vegetables, flatbread, first courses and pilaf.
About its advantages
This Asian oven is renowned for its economy. One bookmark of firewood is enough to cook pilaf, fry a kebab, bake cakes, and even boil a kettle. At the same time, the products do not dry out and retain their useful properties.
About the principle of work
Firewood is laid inside and set on fire. After the fuel burns out, the walls of the furnace are heated to 400 ° C and then slowly cool down, providing powerful heat transfer. Unlike the barbecue, cooking is not done with the heat from the coals, but with the heat accumulated by the walls of the tandoor during fuel combustion. Due to this, a higher and more uniform temperature is maintained: food is cooked much faster and baked evenly from all sides at once.
About the device
A tandoor is always a bowl with a wide mouth, through which fuel is applied, ash is removed and food is loaded. It is closed with a lid. Otherwise, the design of the ovens may vary. There are tandoor buried in the ground and aboveground options. The latter can also be portable.
Earthen tandoors are the simplest. In fact, this is a pit with walls plastered with clay or lined with bricks, which is covered with a lid and has holes for air supply.
Above-ground ovens are much more complicated. Real tandoors are molded by hand from special clay with the addition of goat or camel hair. After firing, the hairs burn out, leaving cavities inside that retain heat. It is possible to observe all the nuances of the technology only in the hot and dry climate of Central Asia - in other conditions, the clay will crack and nothing will come of it.
That is why most of the craftsmen prefer terrestrial tandoors made of brick, stone and other materials. Such structures are less susceptible to cracks, are easier to manufacture and, unlike clay ones, forgive mistakes.
About heat capacity
The larger the size of the tandoor and the thicker its walls, the more heat it can accumulate and, accordingly, give off. But the catch is that the oven works only when it is fully warmed up - and it will not work to cook by heating it just a little. There is simply no power adjustment here.
That is why it is very important to determine the tasks of the tandoor before its construction. If you are not going to cook on a restaurant scale and bake whole rams, then it is better to make an oven with a wall thickness of no more than 65 mm (brick per edge), 600–800 mm high and weighing about 100 kg.
Otherwise, you can go broke on wood, not to mention the surplus of materials. In addition, the unused heat after cooking will be wasted.
About insulation
Insulation plays a very important role, and it should be done regardless of the size of the tandoor. The insulated construction retains heat for longer and better, which means it saves fuel and allows you to cook more meals at a time. Basalt and kaolin wool, kerablunket, which are used to wrap the oven from the outside, or expanded clay - it is poured between the walls of the firebox and the tandoor cladding, are used as insulation.
In the Telegram channel “Life hacker»Only the best writing about technology, relationships, sports, cinema and more. Subscribe!
In our Pinterest only the best texts about relationships, sports, cinema, health and much more. Subscribe!
How to whip up a temporary brick tandoor
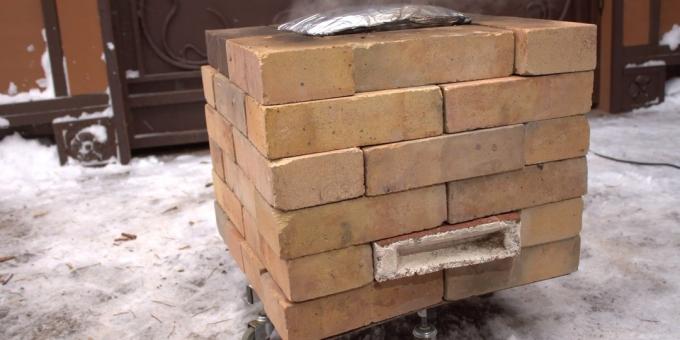
A very simple oven that can be assembled without mortar or any tools. A great option when you want to cook meat, but the grill and grill are already tired. The author uses a base from a chair on wheels, but this is not necessary if you are not going to move the stove from place to place.
What is needed
- Bricks;
- Metal sheet;
- base from the chair.
How to do
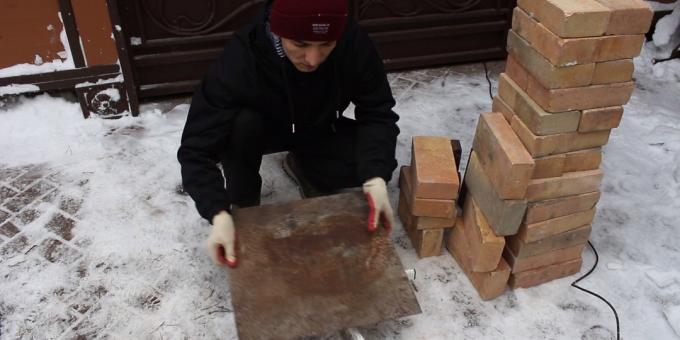
Place a suitable sized piece of metal on the chair cross or just on the ground.
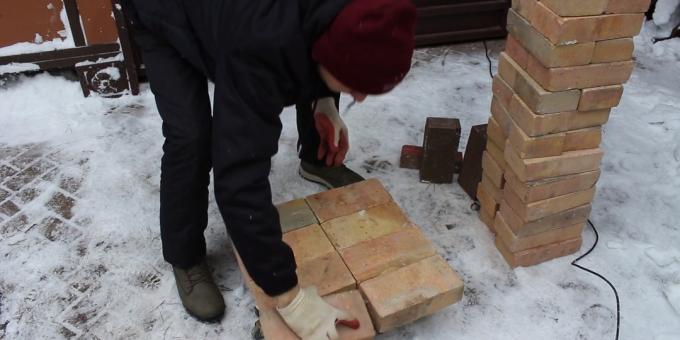
Cover it with a solid layer of eight bricks on top.

In the second row, place five bricks along the outline.
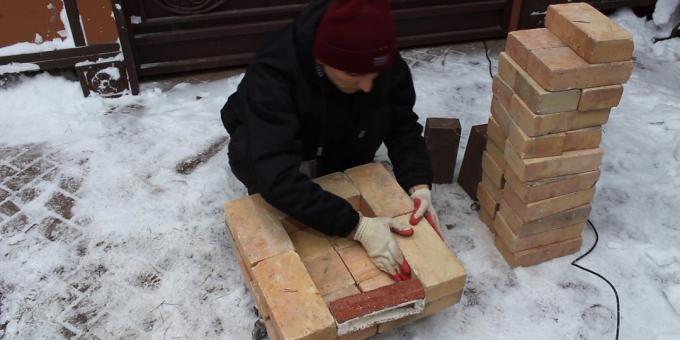
The remaining space in front will act as an ash pan. As a shutter, you can use a brick cut along or a whole brick. In the latter case, it will be even more convenient: if you do not insert it completely, then it will be easier to get it out.
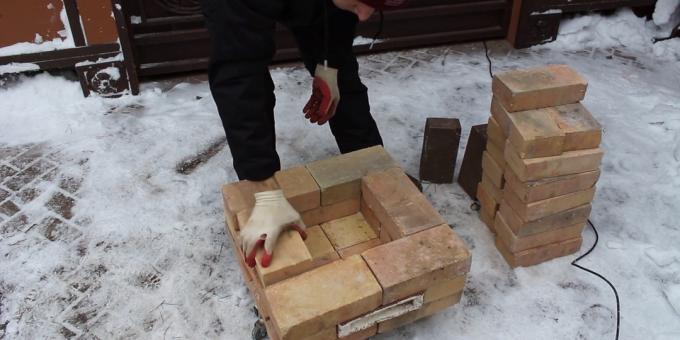
Tying the seams (the center of the upper block falls on the joint of the two lower ones), lay the bricks of the third row.
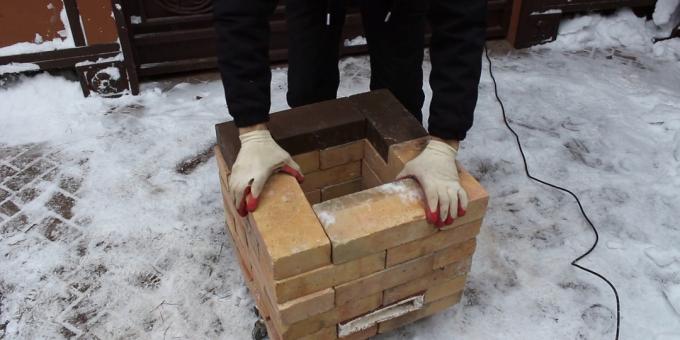
Using the same principle, collect the remaining rows, bringing the tandoor to the desired height.
How to make a tandoor on wheels from a barrel and a brick

Convenient oven with a relatively simple design. The main advantages are mobility and insulation. The size is just right for home use. For a more accurate assembly, you will have to cut the bricks, but if you wish, you can not bother with this and just fill all the cavities from a loose fit with masonry mortar.
What is needed
- barrel;
- 3 wheels (2 regular and 1 swivel);
- brick;
- refractory pantry mixture;
- kerablanket or other insulation;
- solvent;
- heat resistant paint;
- 12 M6 bolts with washers and nuts;
- eye bolt;
- mixer;
- trowel;
- rubber mallet;
- Angle Grinder;
- screwdriver;
- drill;
- knife.
How to do
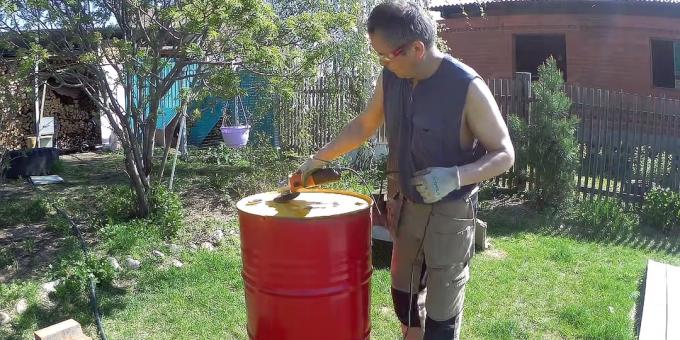
Turn the barrel upside down with the neck up and carefully grind it to metal with an angle grinder.
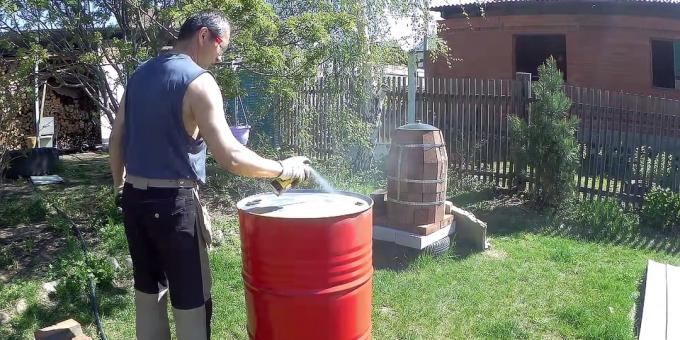
Wipe the surface with a solvent dampened cloth to degrease, then paint with heat resistant paint.

Measure down from the painted end 67 cm and cut the barrel.
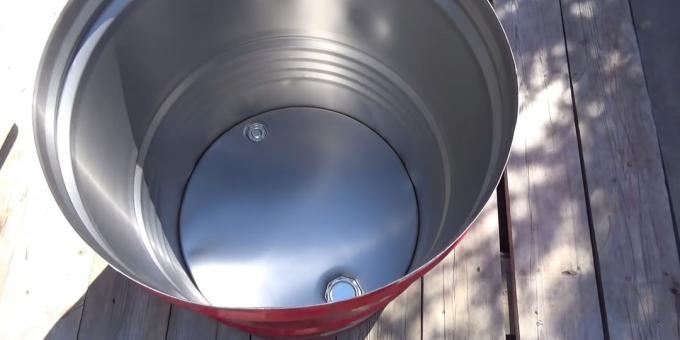
Wipe and scrub the container until it is metallic.

Try on the wheels and drill holes for attaching them.
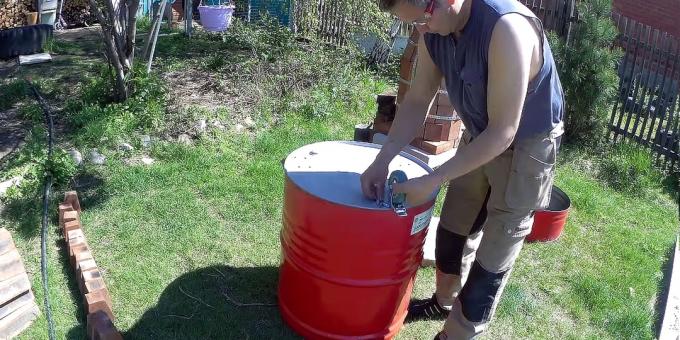
Install the wheels and secure them with bolts and nuts.
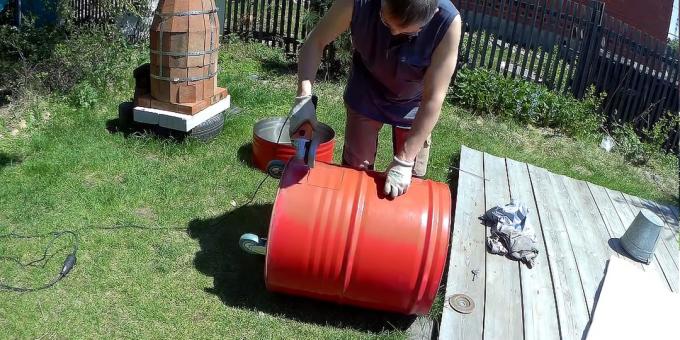
Measure 90 mm from the bottom of the barrel and, with half a brick attached, circle it. Then cut out a window that will act as an ash pan (blower).
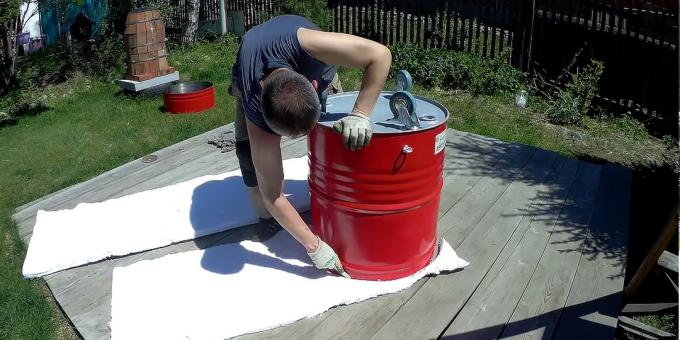
Place the upside down barrel on the kerablunket and cut two circles along it.
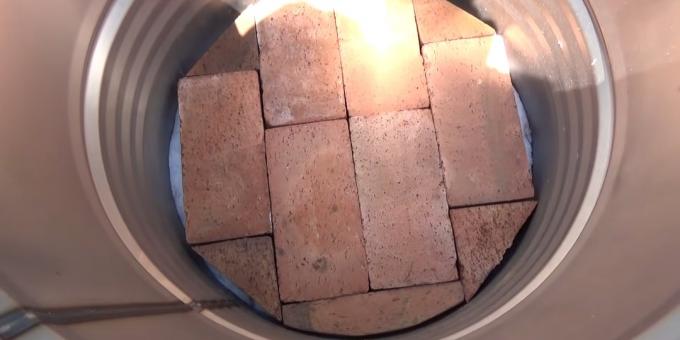
Lay two layers of insulation inside and lay the first row of bricks dry. In order for it to completely cover the entire bottom, you will need to make undercuts. Shape them using an angle grinder.
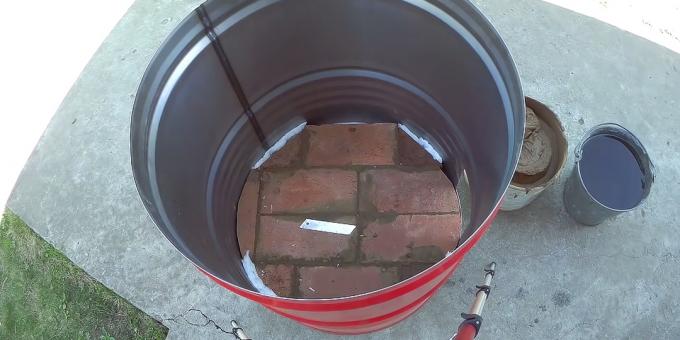
Prepare the masonry mixture according to the instructions. Remove the bricks from the first row and re-lay them, but this time on the mortar. Fill the remaining gaps with scraps of insulation.
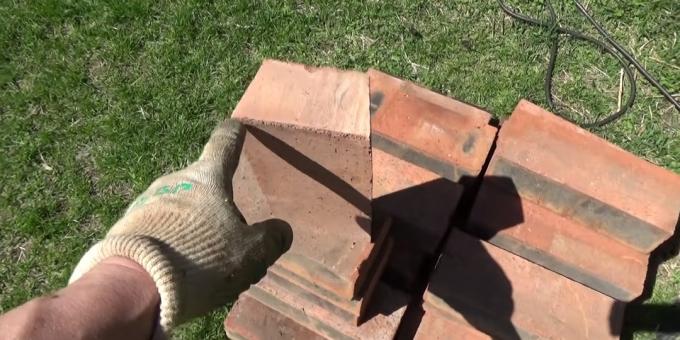
File the bricks for the second row. To do this, cut the side edges at an angle to make a trapezoid: 12 cm at the bottom (standard brick size) and 9 cm at the top.
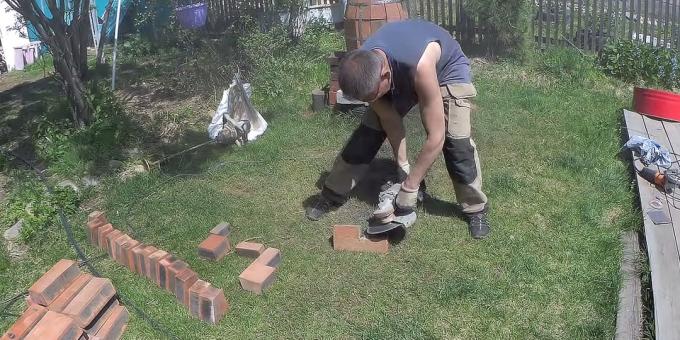
Also make two elements for the ash pan vault: in the previously cut bricks, cut out grooves 12.5 cm long on the long side and 6 cm on the short side.
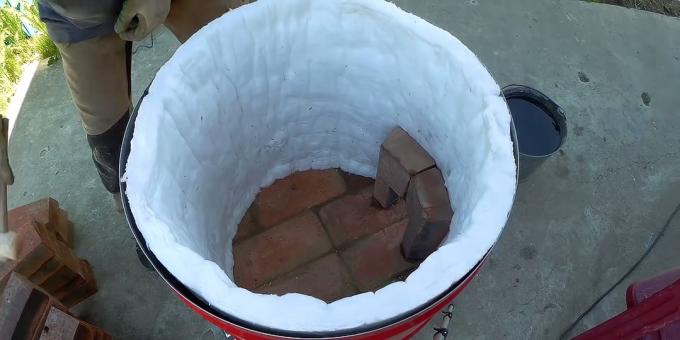
Place the keroblunket inside the barrel and cut to size. Make an ash pan window and set the cut bricks in front of it, having previously greased them with mortar.
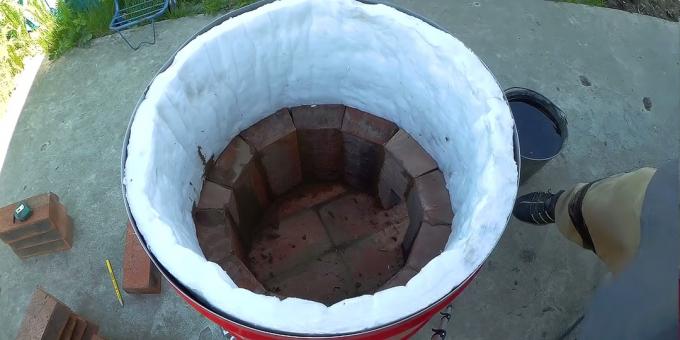
Lay the rest of the stones of the second row, cutting the last one so that it fits tightly inside. If necessary, tap the bricks with a mallet to fit and align.

Form the next row in the same way. Do not forget about the dressing: the upper brick should stand on the lower two, overlapping them in the center of the seam.

Cut the elements for the top row from the laid flat bricks in the form of a trapezoid. Its long base should be 12 cm, and its short one should be 6.5 cm. One block will produce two such elements. Lay them dry and try them on.
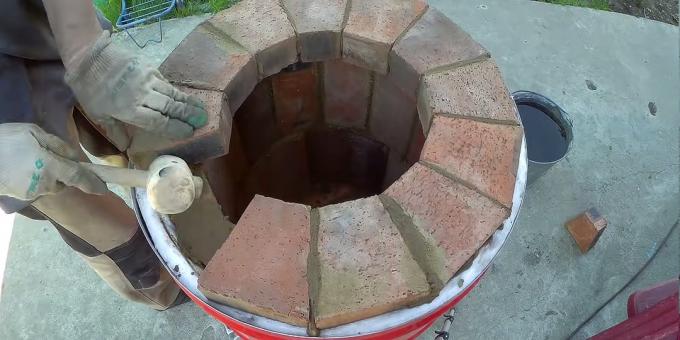
After that, lay on the mortar. Cut the last brick to the desired size and install.
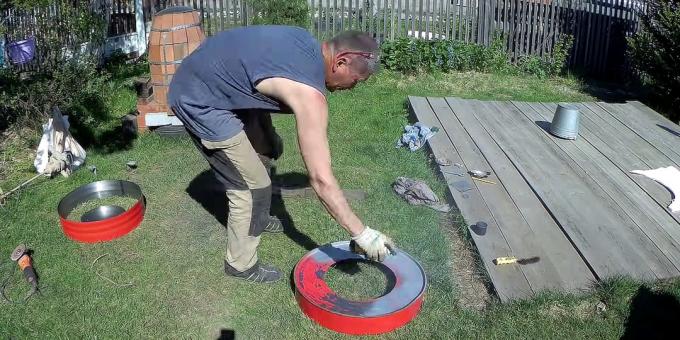
From the rest of the barrel, make a lid high enough to overlap the top row of bricks with a slight overlap on the furnace body. Cut a hole in the lid along the inner diameter of the tandoor, and then paint with heat-resistant paint, having previously cleaned the surface.
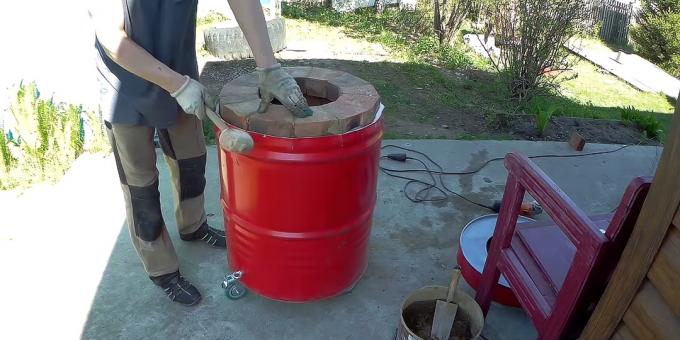
Using the angle grinder, make vertical cuts in the upper part of the barrel and tap the edge with a mallet. This is necessary to make the case diameter slightly smaller.
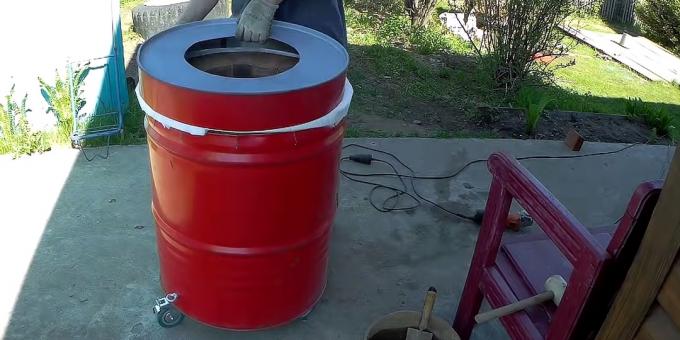
Run a strip of kerablanquet in a circle and slide the lid on top.
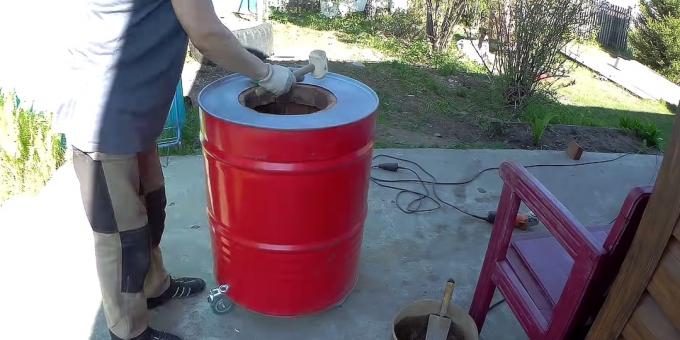
Fit the upper part tightly with a mallet and, at the junction with the lower part, fix it with screws in a circle.
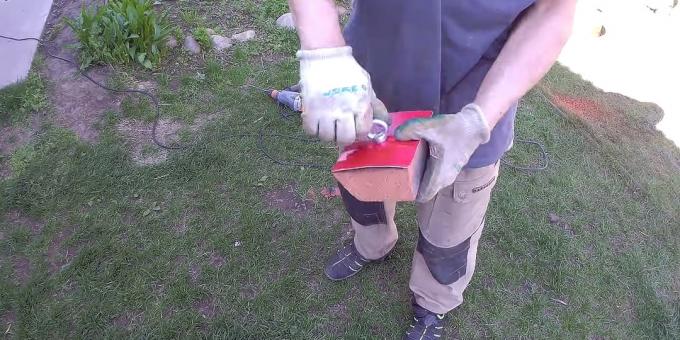
Cut out the ash pan flap from the brick, drill a hole, and then cover it with a piece of metal from the barrel and connect it all with an eye-bolt, the ring of which will act as a handle.
How to make a square brick tandoor with cladding and insulation

What is needed
- Fireclay brick;
- facing brick;
- refractory masonry mixture;
- ash pan door;
- grate;
- galvanized steel wire 2 mm thick;
- cement;
- sand;
- board;
- crushed stone;
- roofing material;
- expanded clay;
- boards;
- screwdriver;
- Angle Grinder;
- trowel;
- a hammer;
- level.
How to do
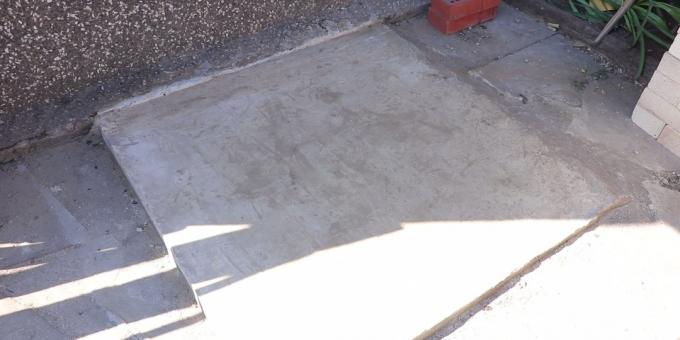
Prepare the base: dig a layer of soil 20 cm deep, cover it with rubble, tamp, and then set along the contour of the formwork from the boards and fill with concrete, putting inside several rods of reinforcement or a mesh for reinforcement.
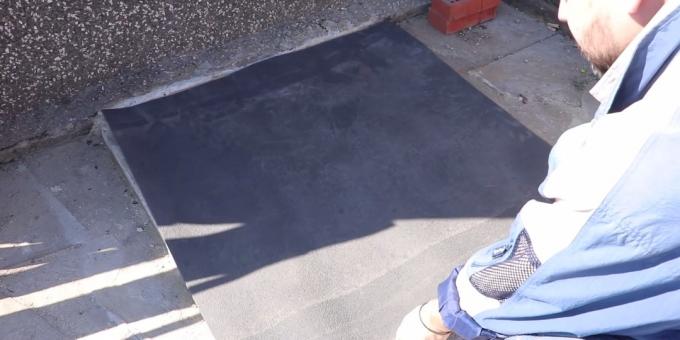
After a week, when the concrete has hardened, you can start. Lay roofing material or other waterproofing material on the base to protect the tandoor from moisture.
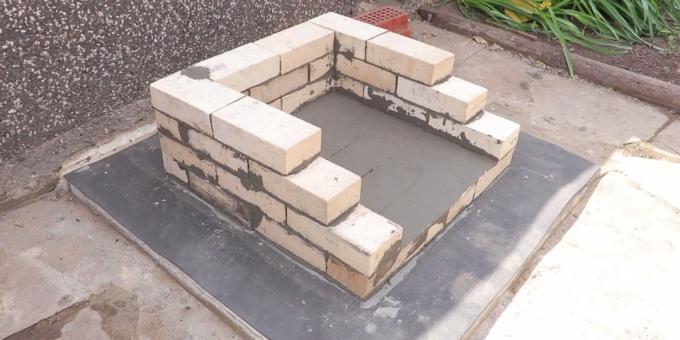
Lay out the bottom continuous row in the form of a square, size - 3 × 3 bricks (fireclay) on the refractory mixture. The next three rows are only the side and back walls. Leave the front as it is for now. To prevent the mortar from drying out when laying fireclay bricks, dip the latter in water before installing it in place.
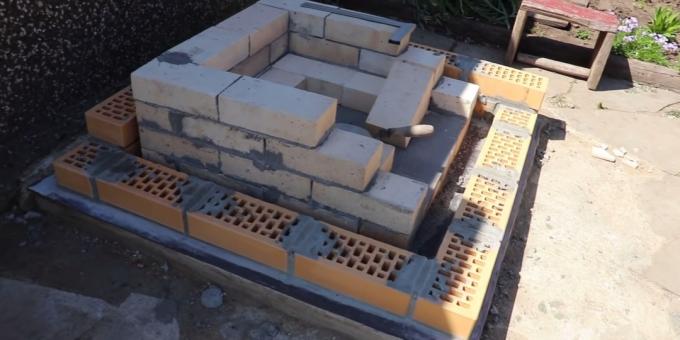
Now lift up a couple of rows of outer cladding. It has a size of 4 × 4 bricks. Place them on a ready-made or home-made cement-sand mortar: 1 part cement to 3 parts sand with the addition of water until sour cream is thick.
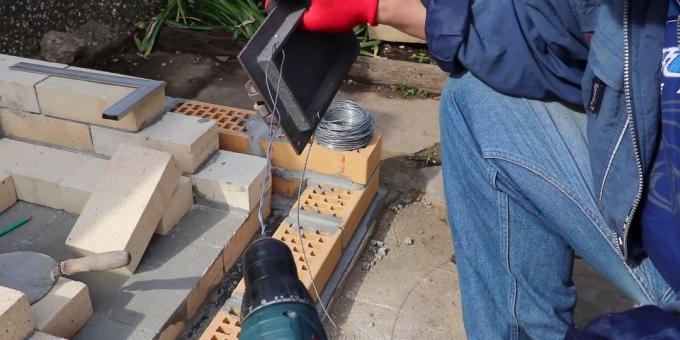
Use a screwdriver to twist the wire whiskers, after passing them through the holes in each corner of the door.
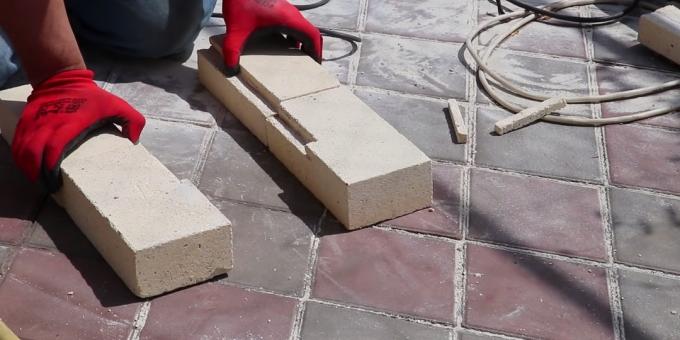
Next, lay dry, two fireclay bricks at the side walls and one at the back, to make the letter "P". On top of it will lay a grate, through which burnt coals will wake up. To make it flush with the bricks, cut small grooves in them to fit the grate.
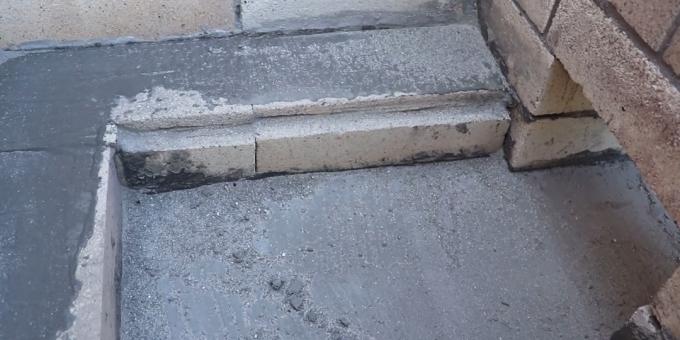
Finally, place the cut bricks on top of the refractory mixture.
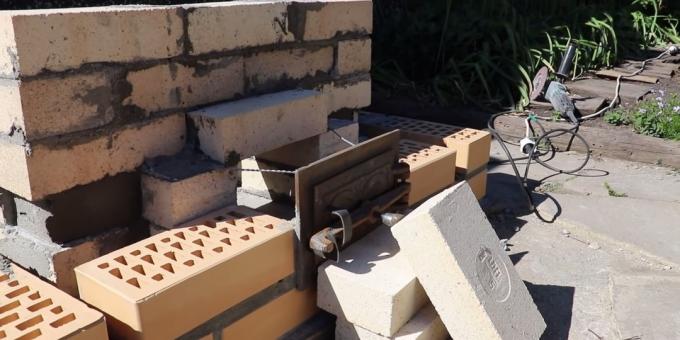
Install the ash pan door in the facing masonry and secure it by sinking the wire whiskers into the solution. Along the way, make a frame from fireclay bricks to the size of the door, which will fill the space between the firebox and the cladding.
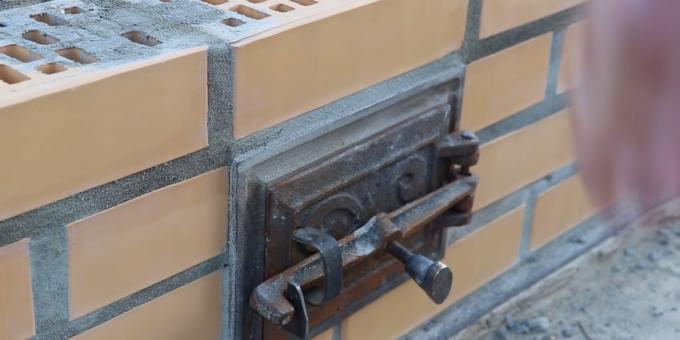
Add two more rows of exterior masonry to cover the ash pan.
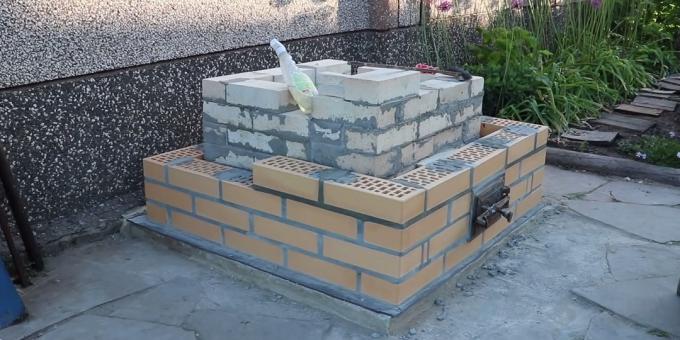
Continue laying, alternately installing a couple of rows of refractory and facing bricks. Control the horizontal alignment with a level and correct protruding blocks with light hammer blows.
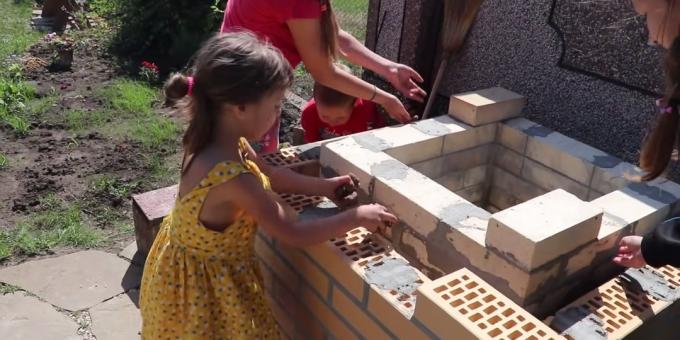
When 8-9 rows are ready, fill the cavity between the firebox and the outer walls with expanded clay so that the tandoor keeps the heat longer.
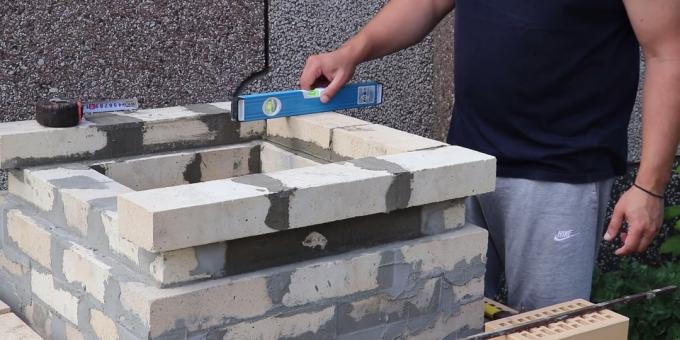
Lay the bricks in the 13th row not flush with the lower level, but moving them 3.5 cm inward. Then put the 14th row as usual, and then in the firebox you will get a small shelf on which the lid will rest.
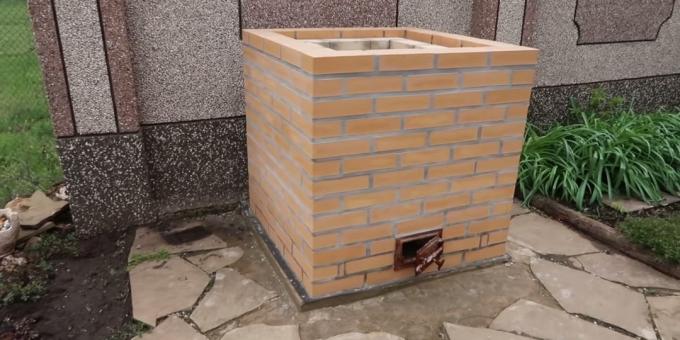
Raise the facing masonry by 14 rows, add expanded clay in the cavity, and the tandoor will be almost ready.
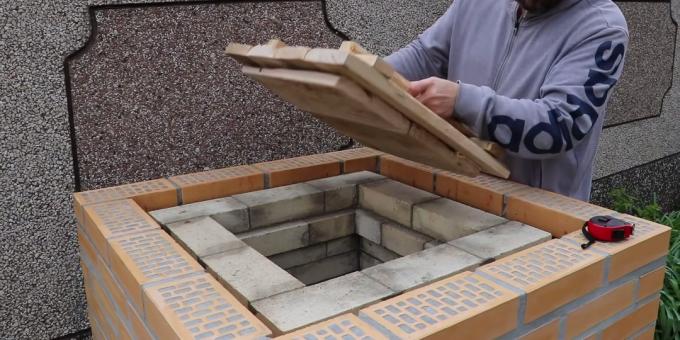
All that remains is to make the lid. Saw the boards to fit the size of the firebox and screw them together. For more effective thermal insulation, it is better to make the lid two-layer: the first layer lies on the shelf inside the firebox, and the second one covers it from above, protruding slightly outward. Make handles from the same board so that it is convenient to grip the lid.
How to make an octagonal brick tandoor
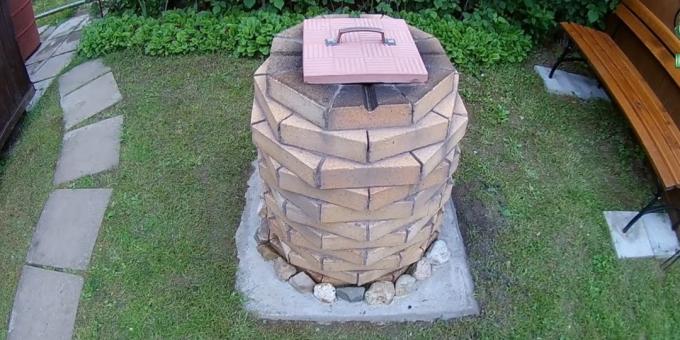
The stove has an original shape, which is an intermediate version between a square and a cylindrical tandoor. It is relatively easy to assemble. The only difficulty is trimming elements in the form of a trapezoid. It is necessary to better fit them to the shape of the circle. In principle, it is possible to replace the refractory brick with a regular one.
What is needed
- Fireclay bricks - 99 pcs;
- refractory masonry mixture;
- reinforcement ⌀10–12 mm - 1 m;
- paving slabs 30 × 30 cm - 1 piece;
- door handle - 2 pcs;
- M6 screws with nuts and washers - 4 pcs;
- crushed stone;
- sand;
- cement;
- Angle Grinder;
- drill;
- drill;
- trowel;
- ruler;
- pencil.
How to do
Prepare a concrete base for the oven measuring 90 x 90 cm. Remove a layer of soil 20 cm deep, cover with rubble and tamp. Pour the concrete flush with the ground, placing some reinforcement bars or a mesh inside to prevent the base from cracking.
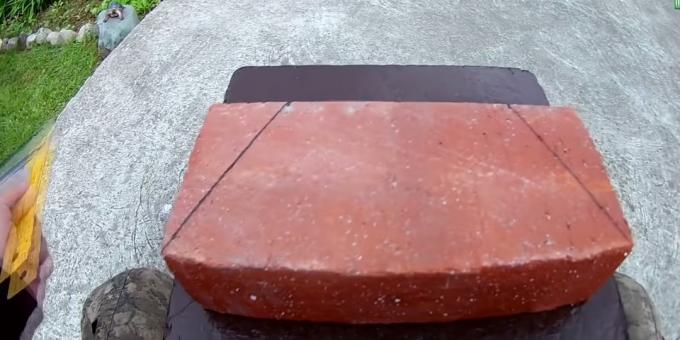
Measure with a ruler 5 cm from the top corners of the brick and draw lines from these points to the bottom corners.
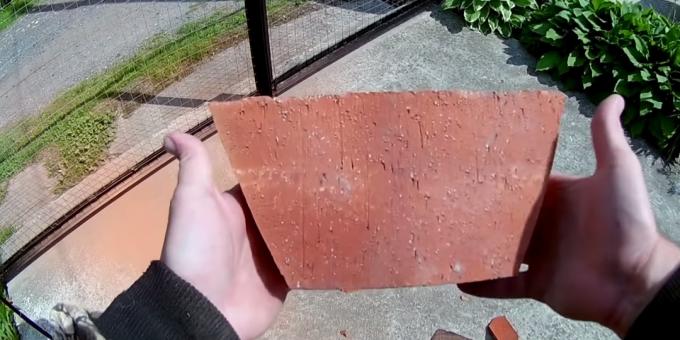
Using the angle grinder, saw off the corners, focusing on the markings. The first row will need 5 such elements.

Fold the resulting trapezoids in a semicircle and secure them with a masonry mixture.
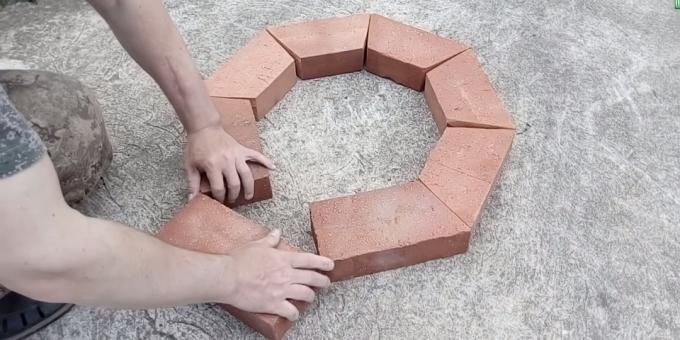
Take two more bricks, but cut one corner from them. Add them to the semicircle. The distance between these elements should be equal to the length of the brick so that the octahedron turns out to be of the correct shape. You can check this with a whole brick. The remaining open part of the contour will serve as an ash pan.
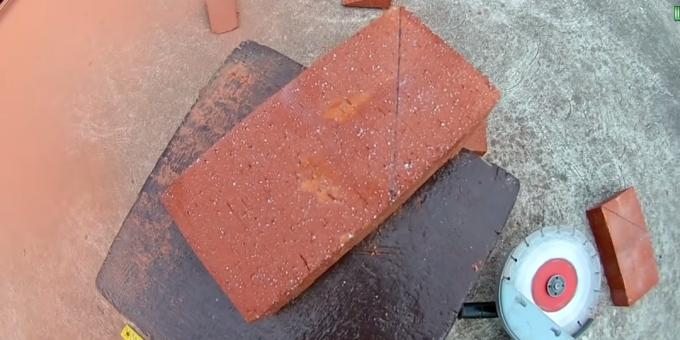
Measure 12 cm on the wide side of the brick and saw off to get a 45 ° piece. You will need three such details.
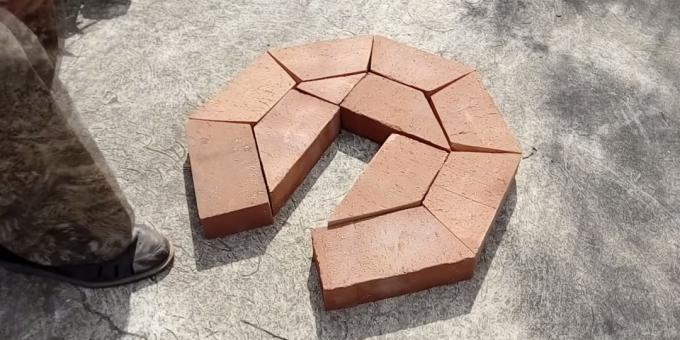
Lay the bottom of the tandoor with 45 ° cut bricks, as shown in the photo. Place one of the trimmed elements in the remaining small triangle.
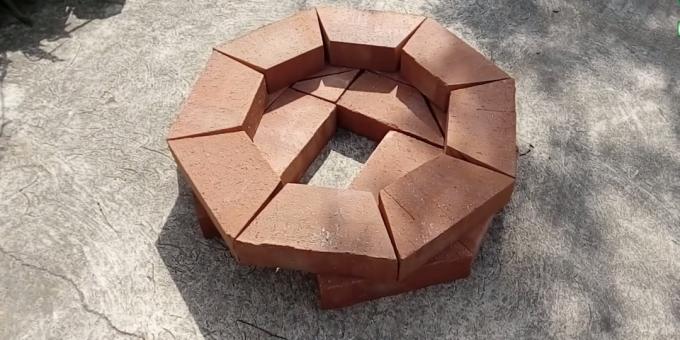
The second row will be much easier. It will need 8 trapezoid bricks. Lay them out with a dressing: the joint of the two upper elements should fall on the center of the lower one.
The 3rd - 9th rows are laid in exactly the same way as the second.

The 10th and 11th rows are performed in much the same way - there is only a slight difference. Before cutting the trapezoid out of bricks, they must be narrowed by sawing off 2.5 cm from the long side.
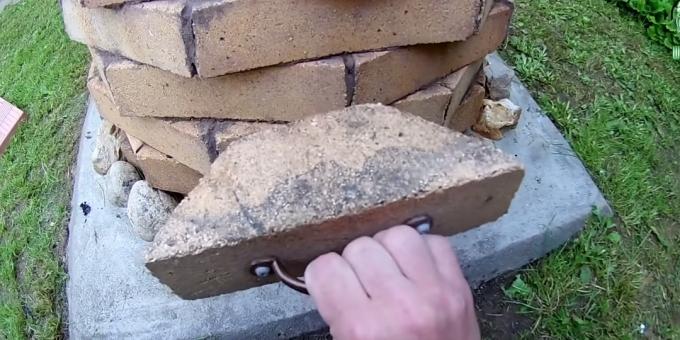
From the same narrow brick, make another trapezoid, which will be the ash pan. Attach the door handle to it with screws, after drilling the holes.
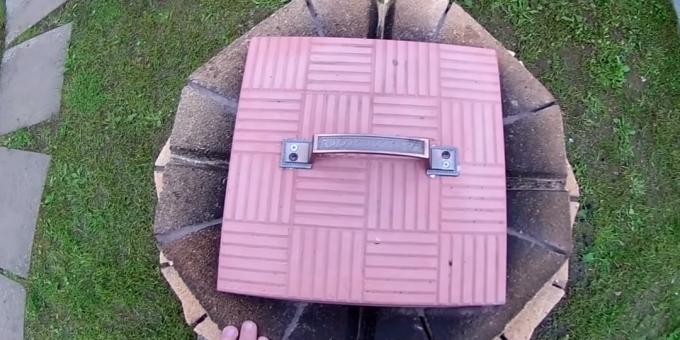
Make a cover from the paving slabs by drilling two holes in it and attaching the door handle with screws.
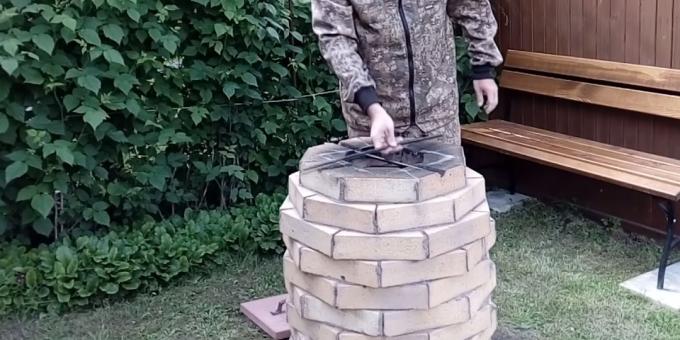
Cut two pieces of rebar about 50 cm long - the skewers will hang from them during cooking. To make the lid close tightly, cut small grooves in the four bricks of the last row crosswise.

Plaster the walls of the tandoor from the inside using a masonry mixture - just by typing in your hand and spreading the mortar evenly.
How to make a tapered cylindrical brick tandoor
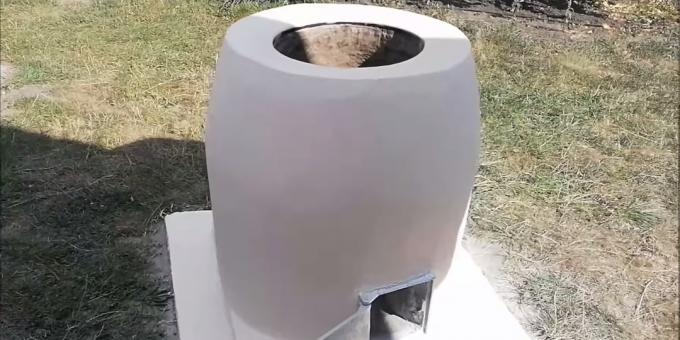
To build such a stove, you have to tinker, but then it will delight you with delicious dishes and become a decoration of the site. The design has a cylindrical shape, and even tapers at the top, so you need a compass template for control. Fortunately, it's easy to do.
What is needed
- Fireclay bricks - 85 pcs;
- refractory pantry mixture - 5 bags of 25 kg;
- heat-resistant plaster - 1 bag (15 kg);
- masonry mesh - 2 m2;
- knitting wire - 0.5 kg;
- ash pan door - 1 piece;
- heat-resistant paint - 1 bottle;
- moisture resistant paint for the basement - 1 kg;
- crushed stone;
- cement;
- sand;
- boards;
- film;
- a tray or lid from a saucepan;
- roller;
- masking tape;
- concrete mixer;
- level;
- rule;
- grater for grinding;
- putty knife.
How to do

Prepare a base for a tandoor measuring 1 × 1 m by removing a layer of soil 15–20 cm deep and placing the plank formwork on a level.
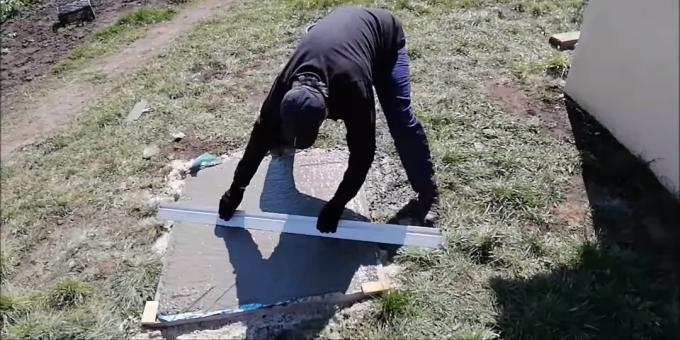
Lay the waterproofing film and fill with concrete, placing the reinforcing mesh inside. Smooth the surface with a rule. Leave it for a couple of weeks for the composition to harden and gain strength.
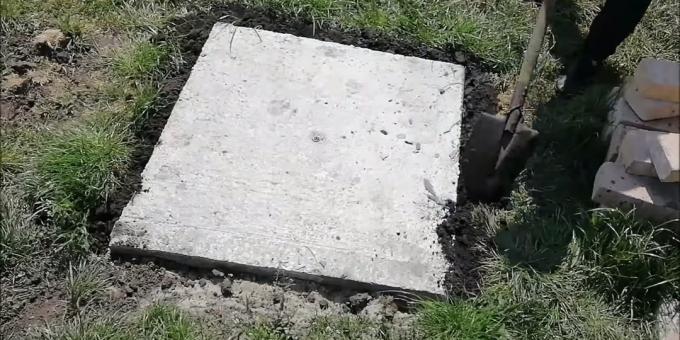
Remove the formwork, fill the voids with earth.
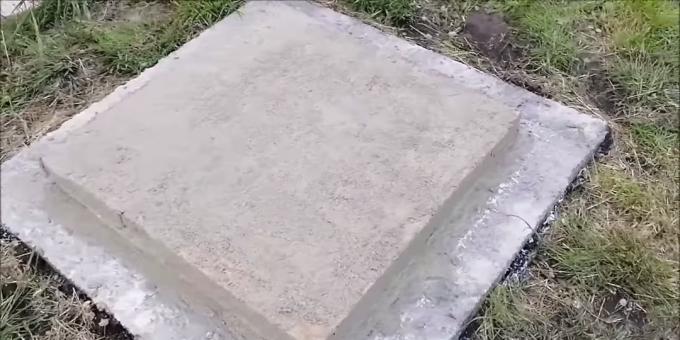
Line a solid row of 3 × 3 bricks on top of the masonry mix. Grease it on top and sides too.
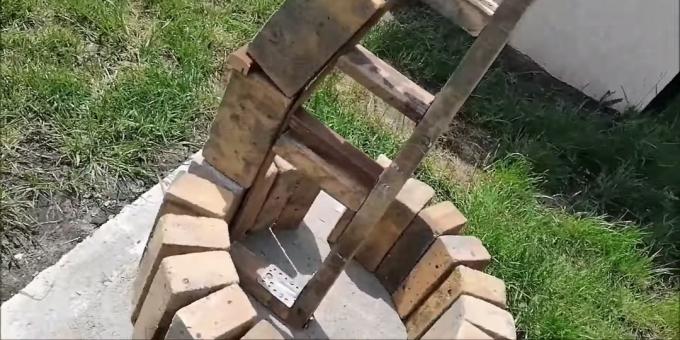
Make a compass template with a rod at the end of the planks. The height of the straight part should be two bricks, further the inclined part - to narrow the walls of the furnace. By rotating the compass, you can align the bricks being laid along it, thereby achieving the correct circle.
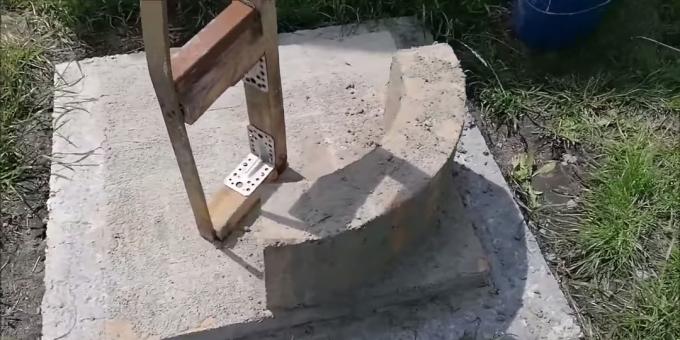
Draw diagonals from the corners of the zero row to find its center. Insert a compass in there and start laying out the first row of bricks on the mortar, gradually rotating the template.

Using this technique, lay out the elements of the first and second rows, leaving an opening the size of the ash pan door.
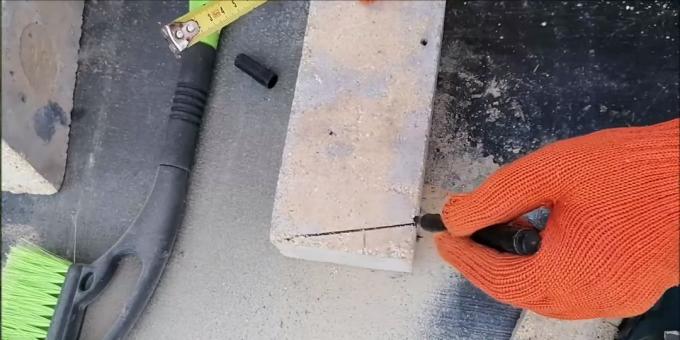
For the third row, the bricks must be trimmed to achieve a narrowing of the tandoor neck. To do this, mark 3 cm on the long side of the brick, connect with a line with the opposite corner and cut off the angle grinder.
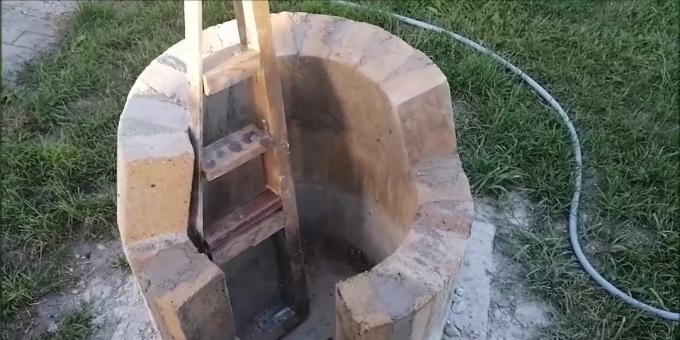
Cut bricks are less stable, therefore, after laying, each of them should be supported by a compass and left for 3-5 minutes until the mortar sets.
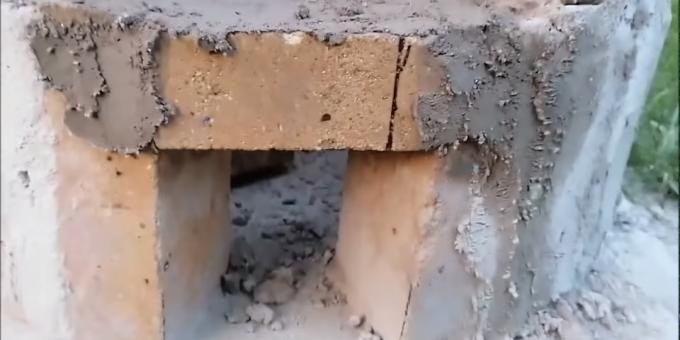
Cut a trapezoid out of the brick and make an ash pan from it so that you can mount the second row on top.
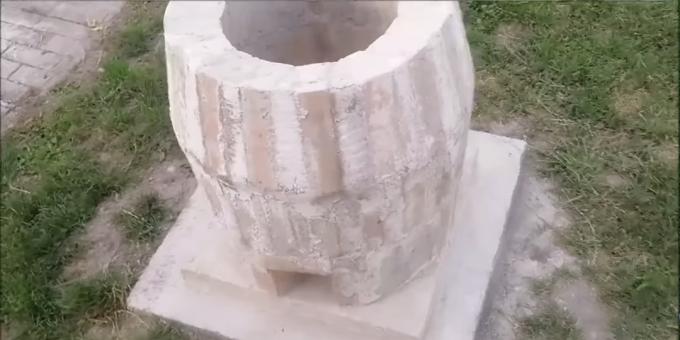
Lay in the remaining bricks of the second and third row.
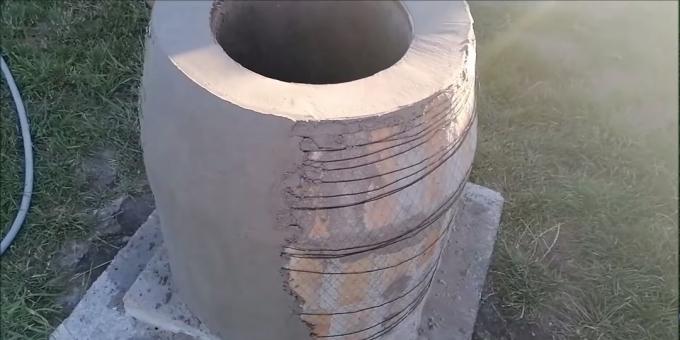
Wrap the tandoor with reinforcing mesh and knitting wire, and then plaster the masonry mixture on top of it and also inside.
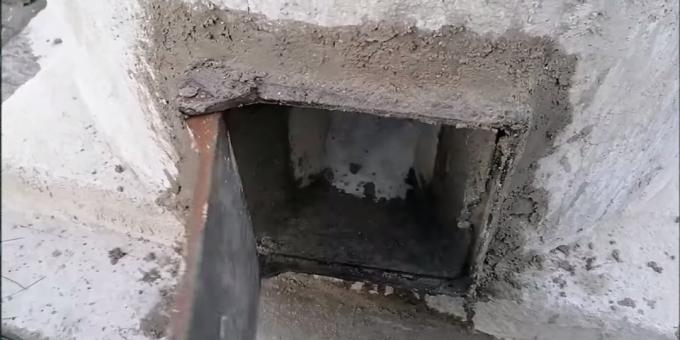
Install the ash pan door by securing it with nails driven into the pre-drilled holes. Spread the solution on top.
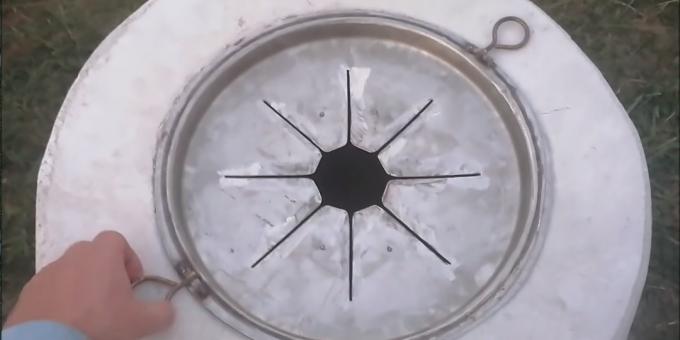
From a metal tray or pan lid of a suitable diameter, make a device for holding skewers by cutting a hole in the middle and sawing grooves in the form of rays.
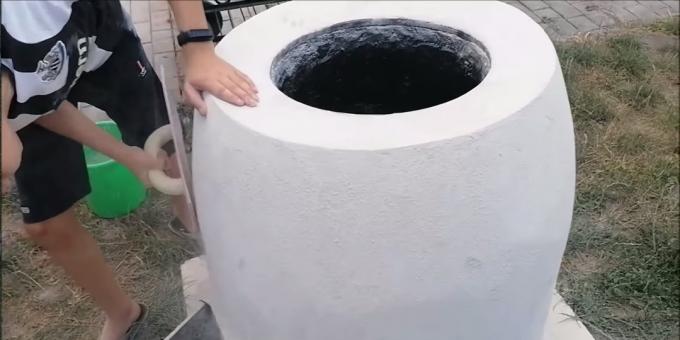
Plaster the outer surface of the oven with a heat-resistant plaster mixture and sand with a trowel.
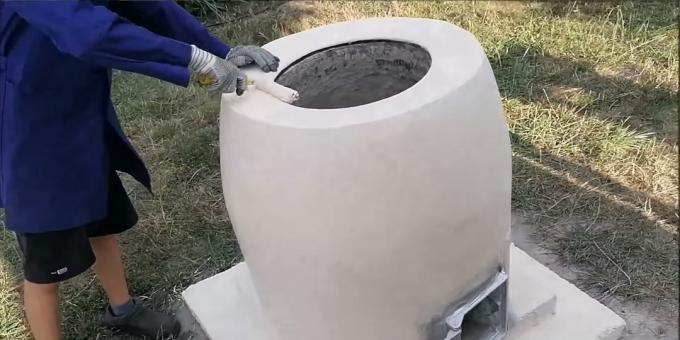
Using a roller, paint the walls of the tandoor with moisture-resistant paint in two layers. Cover the ash pan door around the perimeter with masking tape and paint it with heat-resistant spray paint.
Scientists talk about dozens of COVID-19 symptoms that can persist for more than 6 months
Scientists have named the characteristic symptoms of the delta strain of coronavirus. They are different from the usual COVID-19

