20 crafts for May 9 that even a child can handle
Miscellaneous / / April 29, 2021
Step-by-step instructions will help you make an eternal flame, carnations, a postcard and more.
Eternal flame
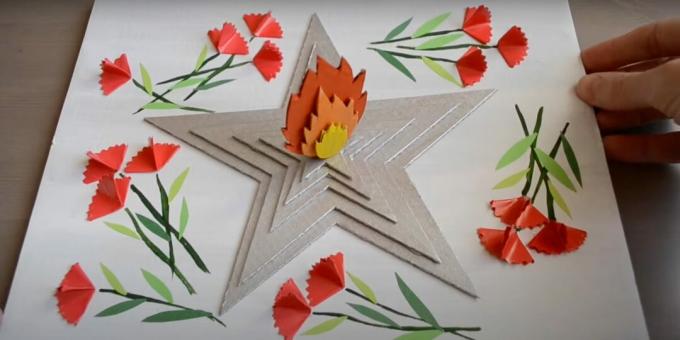
This craft symbolizes the memory of the heroes. The eternal flame made of cardboard and colored paper can be placed at home before the holiday.
What is needed
- Templates;
- Printer;
- White paper;
- scissors;
- corrugated board;
- acrylic paints;
- brush;
- glue gun;
- colored paper;
- ruler ‑ template or compasses;
- glue stick;
- white cardboard;
- green gouache.
How to do
Download, print and cut templates. Use the details to make corrugated cardboard shapes. Cover the stars with silver acrylic paint, use yellow, orange and red for the flames.
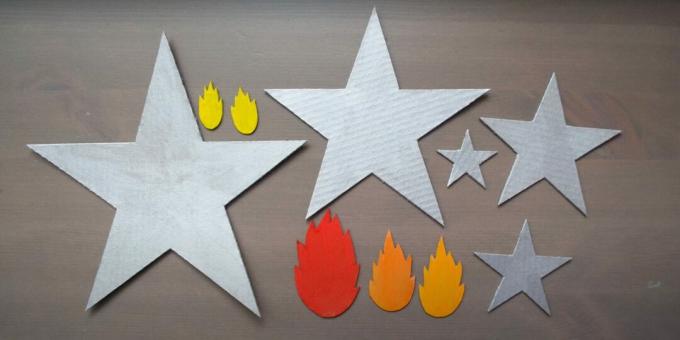
Glue the stars together. The principle is this: on the large form, the one that is slightly smaller is fixed, and so on. Join the fire blanks. You will have two extra ones - they also need to be stitched together.
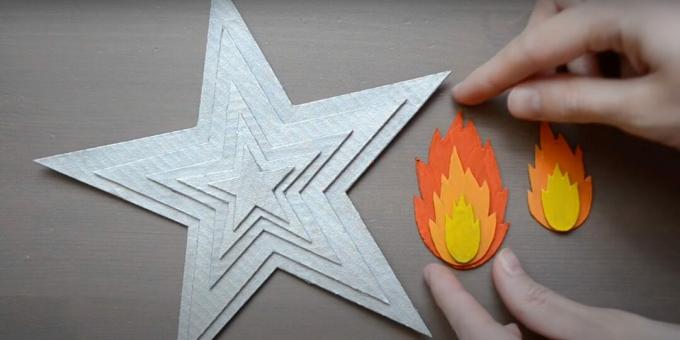
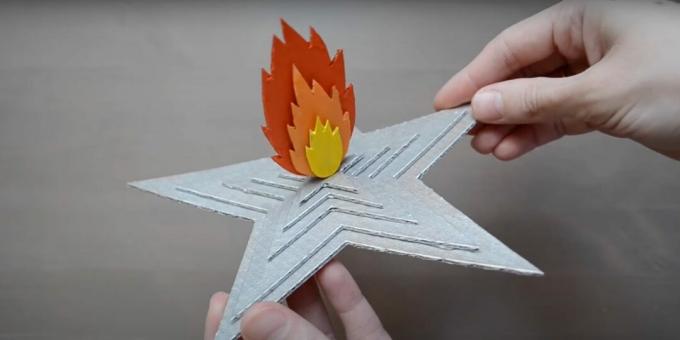
Place the two pieces glued together on the back of the flame. Fix the finished fire in an upright position on the star.
Using a ruler-template or compass, draw several identical circles on red paper. The amount depends on how many colors you want to make. Cut out the details. On the outline of each shape, use scissors to mark small teeth.
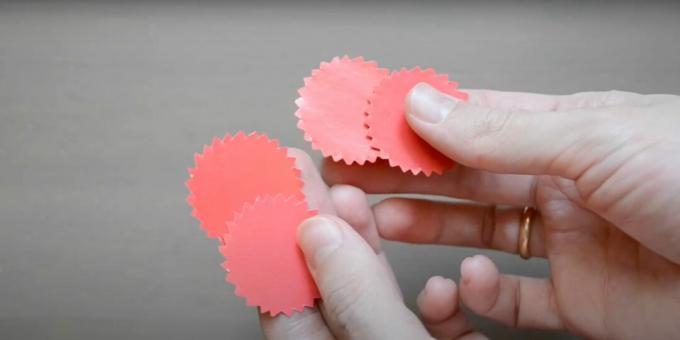
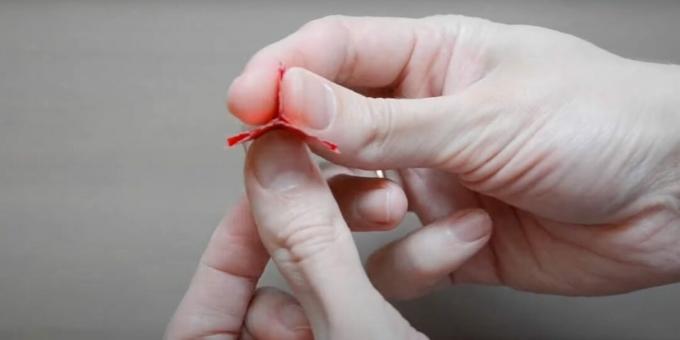
Grease one side of the circle with glue stick. Pinch the part with your fingers so that you get a Y-shape. Do the same with all the blanks. These are carnation buds.
Place a star with a flame in the center of the white cardboard, and buds around the craft. Draw the stems with green paint. Cut out large and small leaves that resemble ovals from colored paper. Glue the details.
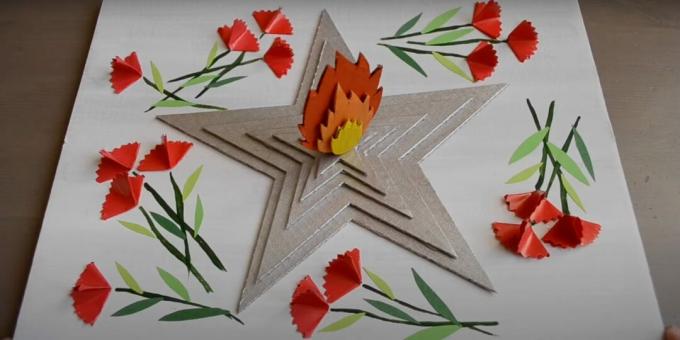
The full version of the master class can be viewed here:
What other options are there
Here is another version of the Eternal Flame:
If you want to place carnation vases next to the fire:
A gun
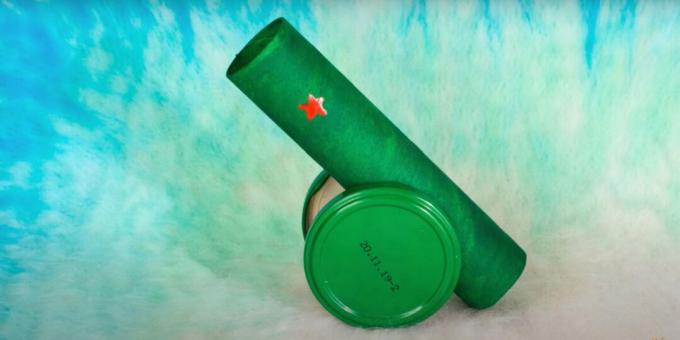
Try making a simple cannon with your child. This simple craft can also become a toy.
What is needed
- Paper towel roll;
- ruler;
- stationery knife;
- green gouache;
- brush;
- green lids for cans;
- glue gun;
- red nail polish.
How to do
Cut a piece 16 cm long from the sleeve. Cover it with green gouache. Let the workpiece dry. You will get the barrel of a gun.
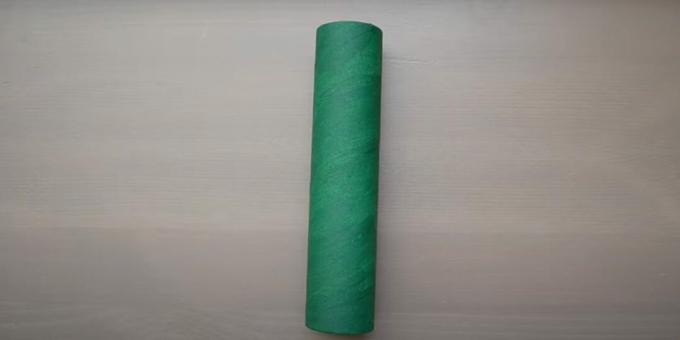
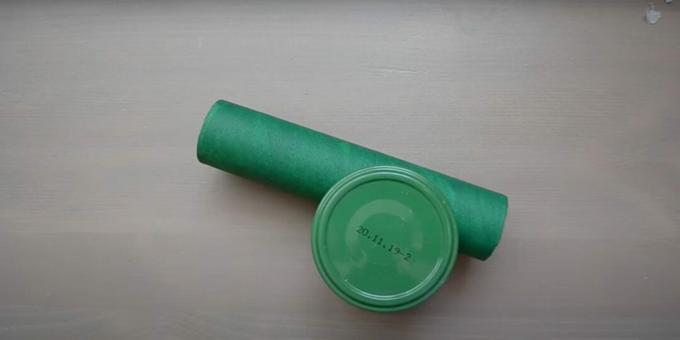
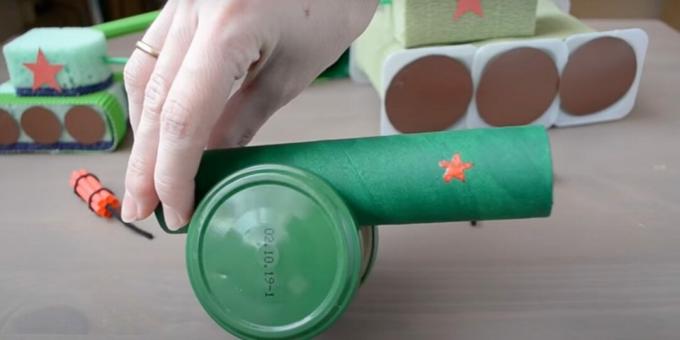
Step back a few centimeters from the edge of the sleeve and glue the can lids. This is a wheel drive. Please note that if you place the parts too close to the hole, the craft will not stand flat on the surface.
Paint a red star on the barrel of the cannon with red varnish. Lifehacker already told on how to do it right.
Nuances - in the video:
What other options are there
This workshop will help you make an almost realistic cannon:
This cannon fires when the button is pressed:
Carnation
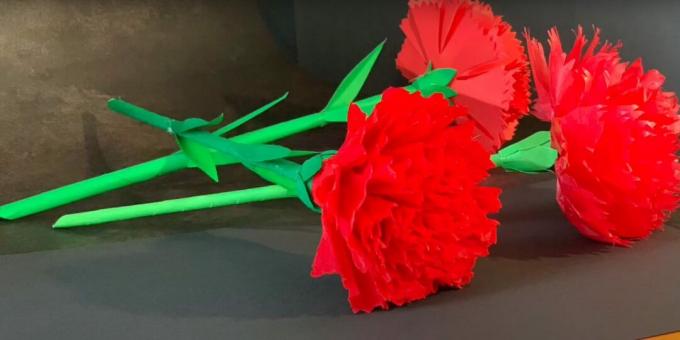
It is not difficult to make this symbol of the holiday. The whole process will take about 10-15 minutes.
What is needed
- Colored paper;
- compass;
- scissors;
- glue gun;
- spoke;
How to do
On red paper, mark several identical circles with a compass, cut them out. Fold one of the shapes several times to form a triangle. Make teardrop cuts on the sides, and many small triangles at the base. Expand the part. This is the bud support.
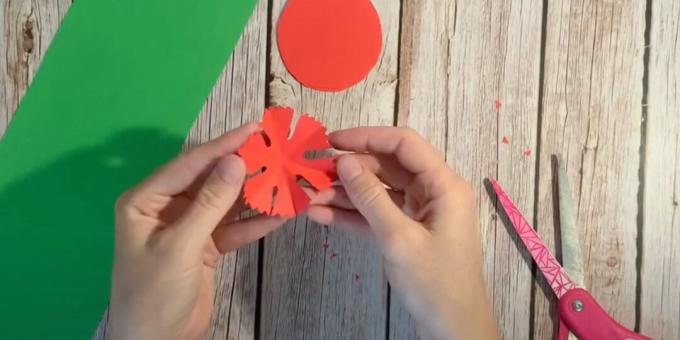
Do the same with the rest of the blanks. Squeeze each (except the first) at the base, collecting in a bag. Glue the molds horizontally to the substrate. You will get a lush bud.
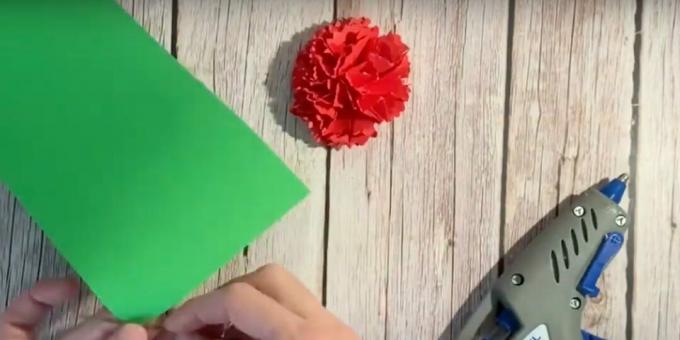
Wrap the knitting needle in several layers of green paper. You should end up with a tight tube. To keep the material tight, fix it with glue. Make serifs at the tip of the part with scissors. This is the trunk of a flower.
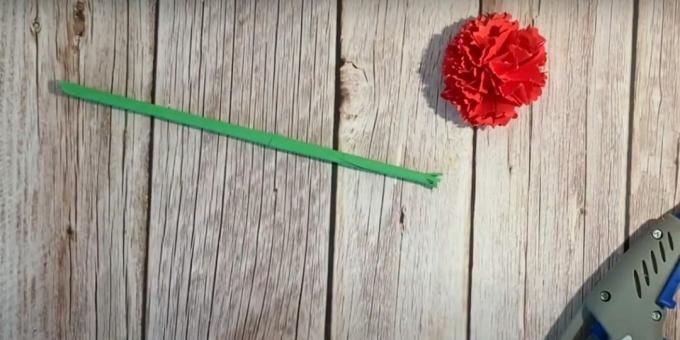
Glue the pieces together. Make small triangles with raised sides out of green paper. Secure under the bud. Make long leaves. They look like ovals with pointed tips. Glue the shapes to the trunk.
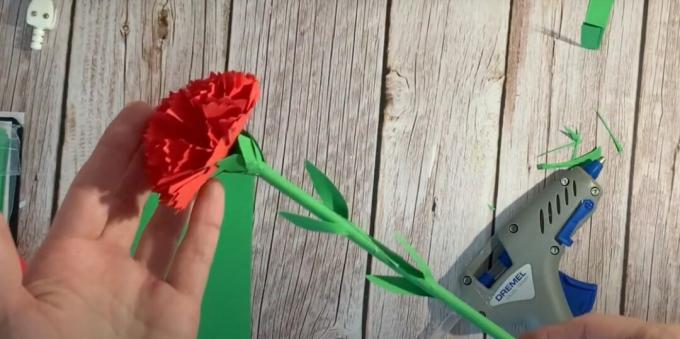
If you need to understand the process even better, watch the detailed master class:
What other options are there
Origami carnations:
Master class on creating a flower from polymer clay:
A carnation can even be made from a napkin and electrical tape:
Soldier
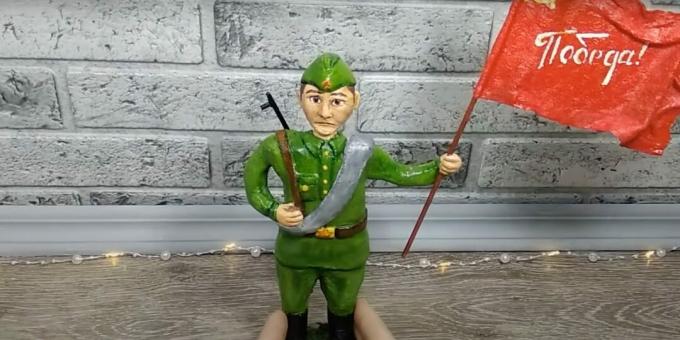
Even a child can make such a figurine, but the craft will take quite a long time.
What is needed
- Foil;
- salty dough;
- rolling pin;
- wooden sticks (3 pieces);
- brush;
- a jar of water;
- sculpting stack;
- glue gun;
- deep cup;
- PVA glue;
- cloth napkin;
- scissors;
- acrylic paints;
- wooden saw cut;
- moss;
- acrylic lacquer.
How to do
Roll a small ball out of foil - this is a blank for the soldier's head. Of salt dough make a flat cake 3–5 cm thick. The material can be rolled out with a rolling pin. Wrap the dough over the foil and then place the blank onto a wooden stick.
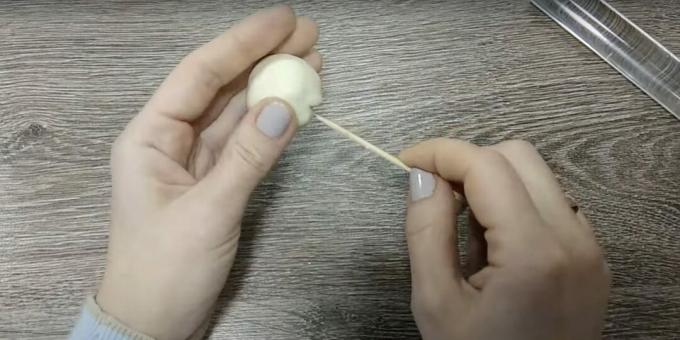
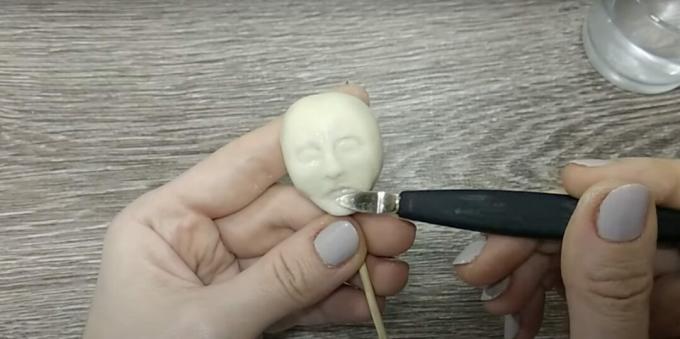
Use your fingers to mark small indentations for the eyes and mouth. Smooth out any irregularities with a damp brush. Stack the almond-shaped eyes. Draw lips and nostrils. Sharpen your chin. Let your head dry.
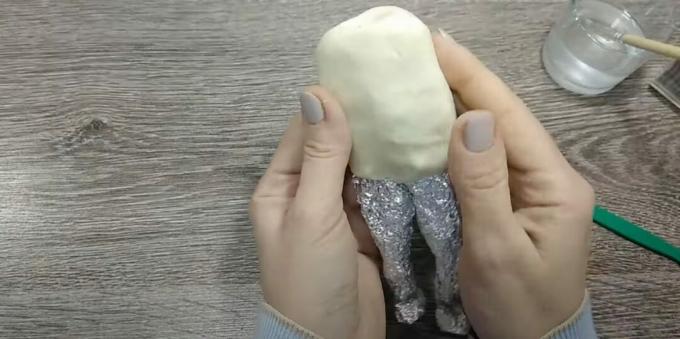
Roll one large oval for the body and two small ones for the feet from the foil. Leg blanks are two sticks extended at the top. Glue the shapes together. Wrap the torso with a dough cake.
Stick the stick between the shoulders, on which the head is fixed. Leave a small gap between the parts. Cover it with a strip of dough for a neck. Prepare two small, flat ear ovals. Secure the shapes, use a stack to draw grooves to show the shells.
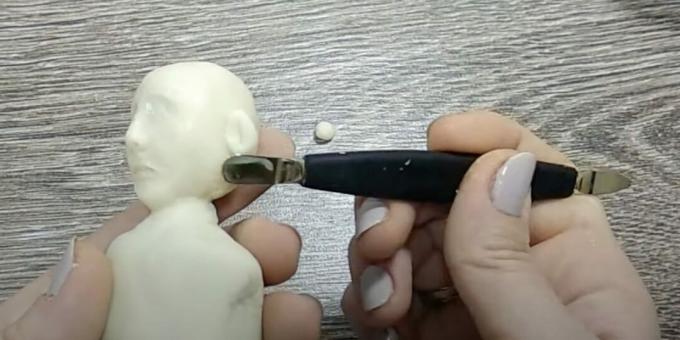
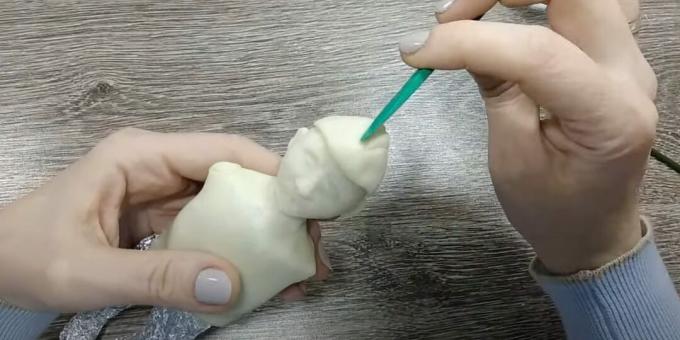
Make a circle of dough and place it on your head. Use your fingers to shape the workpiece into a triangular shape - this is the cap. Stack several stripes on the headdress.
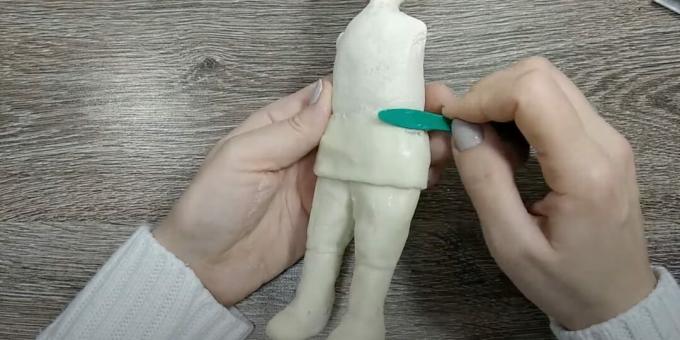
Wrap the dough over your legs. Roll out the strip, secure over the legs, and then smooth the transition to the body.
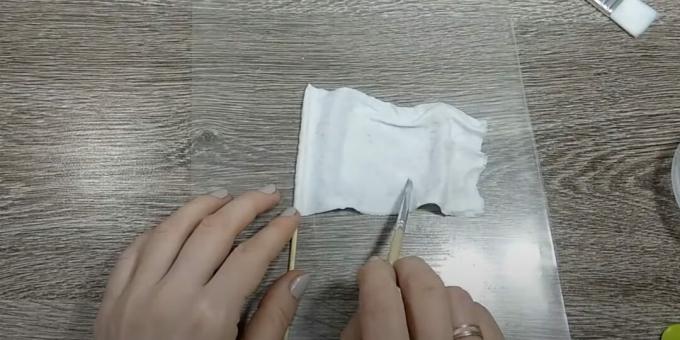
In a deep cup, mix PVA glue with water. Cut a wide strip from a cloth napkin. Soak the workpiece in the solution and then squeeze out. Fold to form a rectangle. Place a wooden stick near the fold. This is a flag. Make several waves-bumps on it, coat with PVA glue and leave to dry.
Fasten the dough oval in the middle of the stick. At the tip there is a triangular butt. Make an arched store. The machine will turn out.
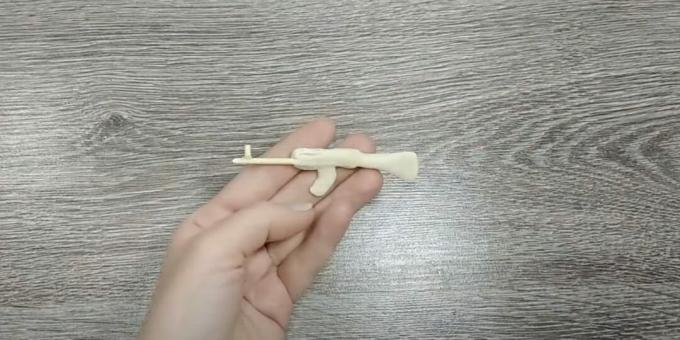
Roll two hand sticks out of the foil. Wrap the dough over the blanks. Stack the border of the sleeve, separate the fingers. Secure one piece to the craft with hot glue. Cover the joint with small pieces of material. If desired, you can blind a belt, pocket, collar.
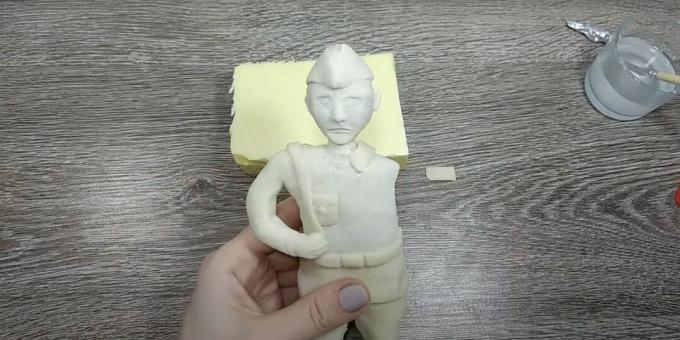
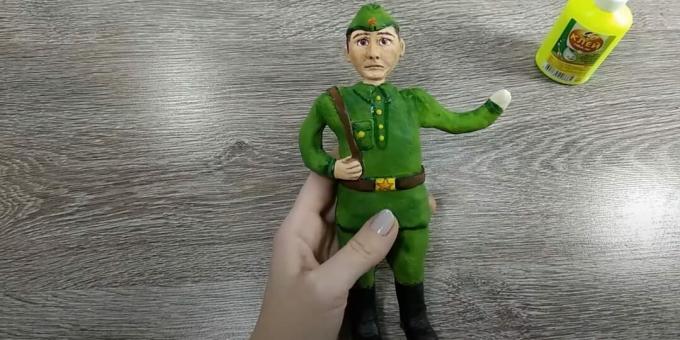
Secure your other hand. She is raised up. Wait for the figurine to dry. Paint over the shape with green paint. To mark the boots, cover the legs in black up to the knee. Use a nude or pink shade for your face and hands. Draw in the eyes, eyebrows and hair.
Fasten a strip of dough across the body, paint over it with gray paint. The flag will be red. In the example, the part has an inscription, a sickle and a hammer. Glue the stick to your hand. Cover the joint with a piece of dough. The black submachine gun must be fixed on the back.
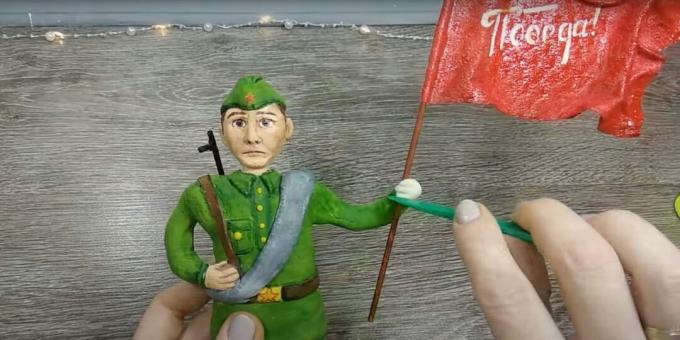
If you want the soldier to be stable, secure it to the saw cut. Place the moss under your feet. When the craft is completely dry, cover it with acrylic varnish.
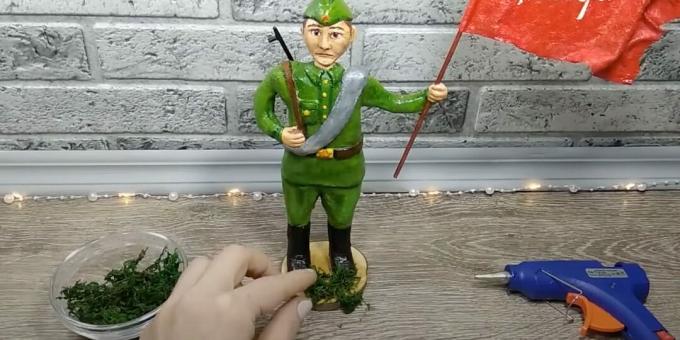
If you have any questions, watch the video instructions:
What other options are there
A very simple craft from a sleeve, colored paper and cardboard:
Here's how to make an origami soldier:
You can even make a figurine from a bottle:
Postcard
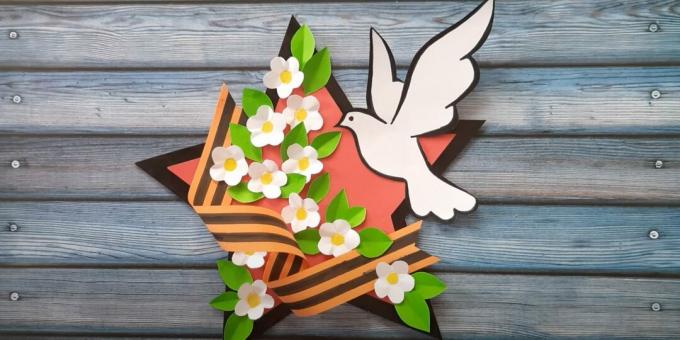
Make this craft if you want to congratulate a loved one. The postcard will not take much time.
What is needed
- Templates;
- Printer;
- White paper;
- scissors;
- colored paper;
- ruler;
- simple pencil;
- black marker;
- glue stick;
- yellow felt-tip pen.
How to do
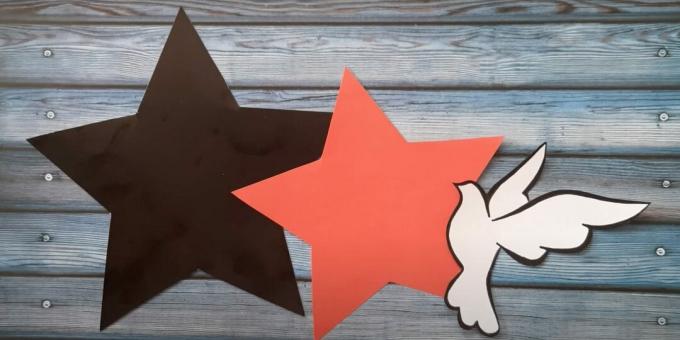
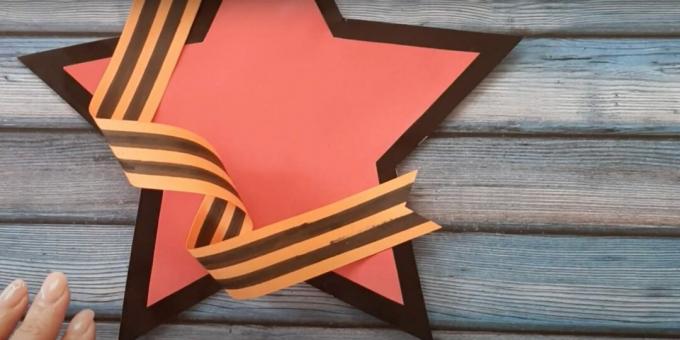
Download templates, print and cut. Make a large star out of black paper, and a small one out of red. The poultry blank does not need to be transferred to the material.
Cut a long, 1-inch rectangle out of orange paper. Draw lines with a pencil, the distance between them is 5 mm. Draw two stripes with a black marker. Get the St. George ribbon.
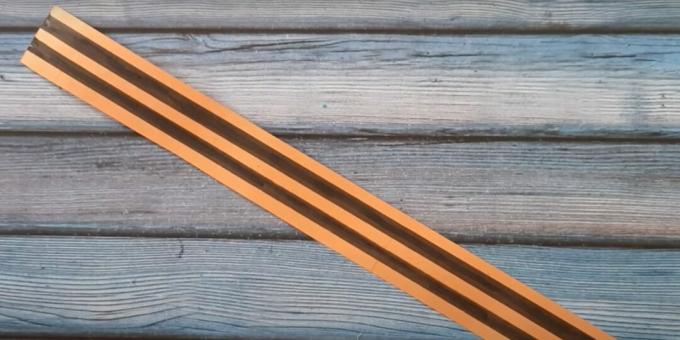
Glue the small star to the large one. Make triangular notches at the edges of the ribbon. Secure the piece to the craft in a spiral-like position.
Sketch a flower on white paper. Cut it out for a template. Use it to make at least 11 buds. At the center of each, draw a yellow circle. Lift the petals.

Cut the leaves out of green paper. In shape, they resemble ovals with pointed tips. Glue the blanks and flowers to the card. Place the bird on the craft.
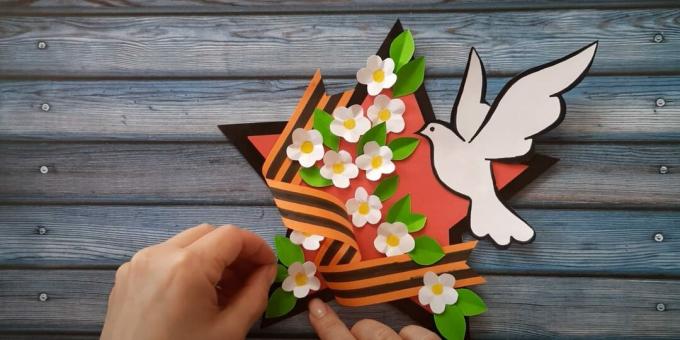
The whole process of creating a postcard can be viewed here:
What other options are there
Simple postcard with lush flowers:
Here's how to make felt postcards:
Tank
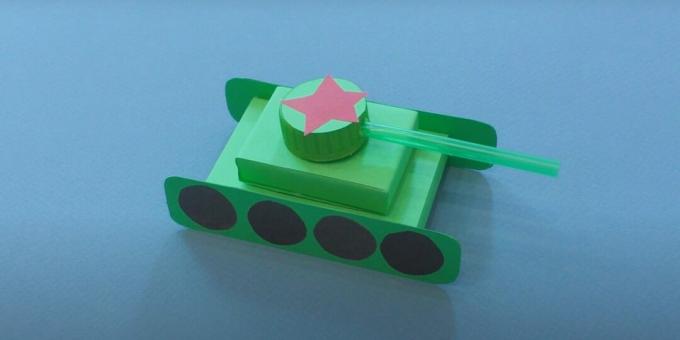
A simple craft can be made and taken to school or kindergarten before the holiday.
What is needed
- Matchboxes (3 pieces);
- Super glue;
- colored paper;
- ruler;
- simple pencil;
- stationery scissors;
- green cardboard;
- green plastic bottle cap;
- nail scissors;
- green cocktail tube;
- plasticine.
How to do
Glue the two matchboxes together to make a long rectangle. Cut two strips out of green paper: 4 × 15 cm and 5 × 11 cm. Paste over the shape and the rest of the box.
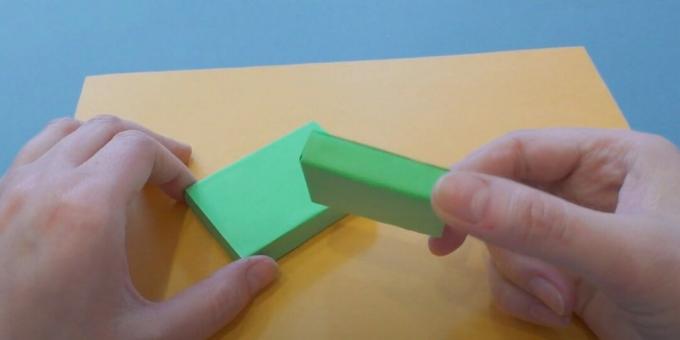
Cut two 2.5 × 10 cm rectangles out of green cardboard, round the corners of the shapes. These are tank tracks. Make eight identical circles of black paper. To make the outline of the wheels even, take the bottle cap and circle it. Secure the parts to the workpieces.
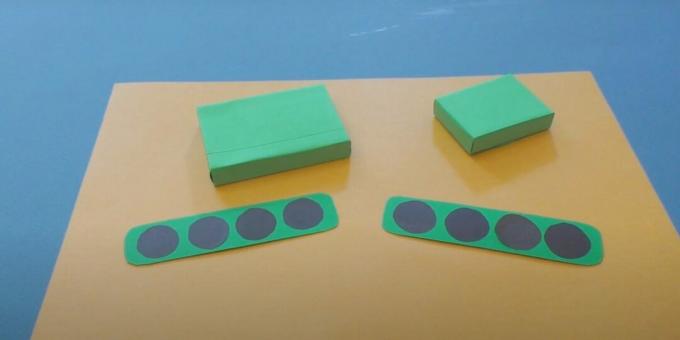
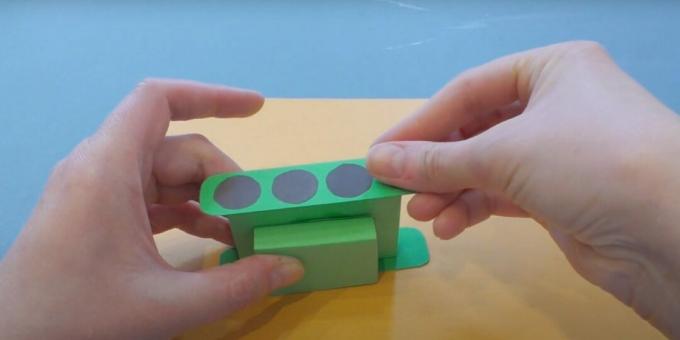
Glue the boxes to the rectangle. You will get a tank hull. Place the tracks on the sides.
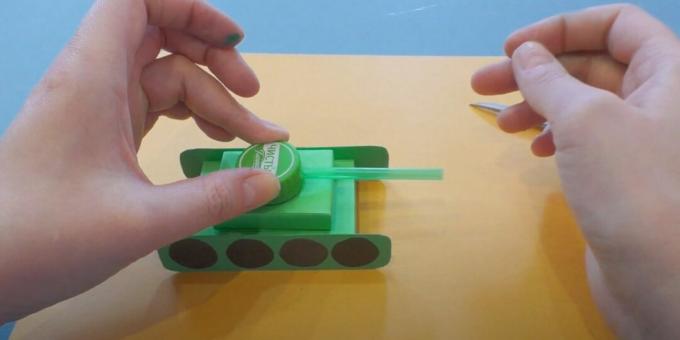
Rotate the nail scissors in one place and make a hole in the side of the lid. Insert a cocktail tube into the hole. If it seems too long, cut it off. Fill the lid from the inside with plasticine. You will get a tower that needs to be fixed at the top of the tank.
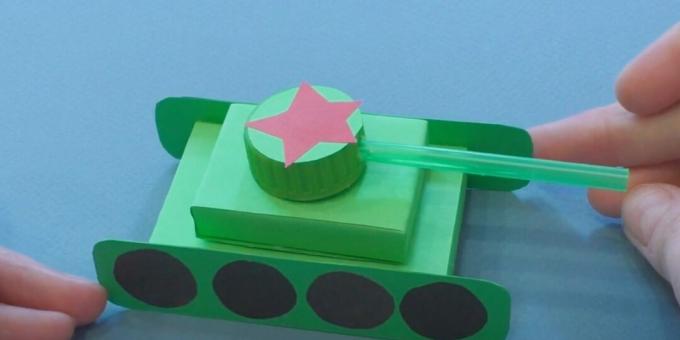
Draw a star on red paper and a circle on green paper. Cut out the pieces, glue to each other, and then fix to the lid.
Nuances - in the video:
What other options are there
The turret of this tank rotates:
If you like to sculpt from plasticine:
Read also🧐
- How to draw space: 19 options that everyone can repeat
- 18 ways to draw a rocket that even a child can do
- How to draw a tank: 19 easy ways
- 24 Easter crafts that will decorate your home and create a festive mood
- 29 cute Easter drawings that even a child can handle


