How to make a printer network
Technologies / / December 30, 2020
Many modern printers are equipped with the ability to connect to a network via Wi-Fi - they print files from remote computers without unnecessary problems. But any ordinary printer can do the same, no bells and whistles. Your household will not have to run to you with external media - just click on the "Print" button.
The most versatile way to share your printer is to share it over your local network. This can be done on all operating systems - Windows, macOS and Linux. We will tell you what is required for this.
Establishing a connection between computers
First of all, you must make sure that your devices are connected to a local network. For details, see our guide on connecting your computer to your computer.
Follow the instructions🖥
- How to connect a computer to a computer
Basically, you don't have to worry too much about the settings. It is enough to connect all devices to one router via LAN cables or connect to a Wi-Fi network. The router will do the rest.
Setting up the printer
Now that all your computers are connected to one local network, you need to share the printer. Sit down at the PC to which your printing device is connected and perform the following steps, depending on the operating system installed.
Windows 10
Click Settings → Network & Internet → Sharing Options. Make sure the "Enable File and Printer Sharing" option is enabled in the "Private" section.

Now go to Settings → Devices → Printers & Scanners. Click on your printer and click "Manage" and then "Printer Properties".
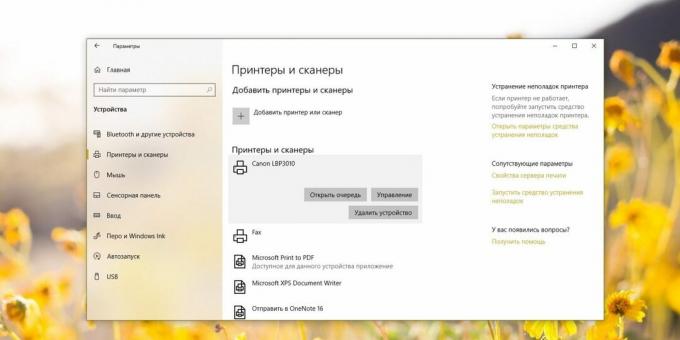
In the properties, activate the checkbox "Sharing this printer".
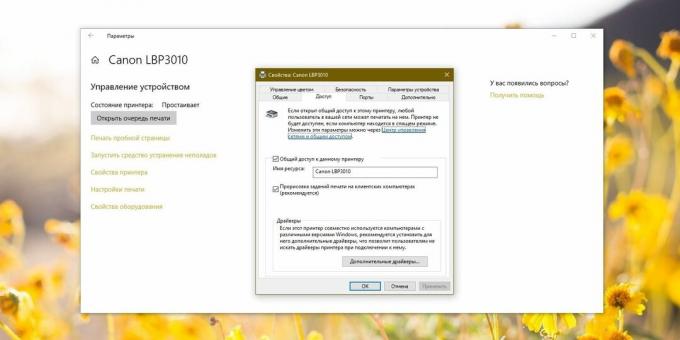
Click Apply.
macOS
Open System Preferences → Printers & Scanners and select your printing device.

Activate the checkbox "Share printer".
Linux
We'll take the popular Ubuntu as an example, but other distributions have similar settings. Open "Settings" → "Devices" → "Printers". Click Advanced Printer Settings.
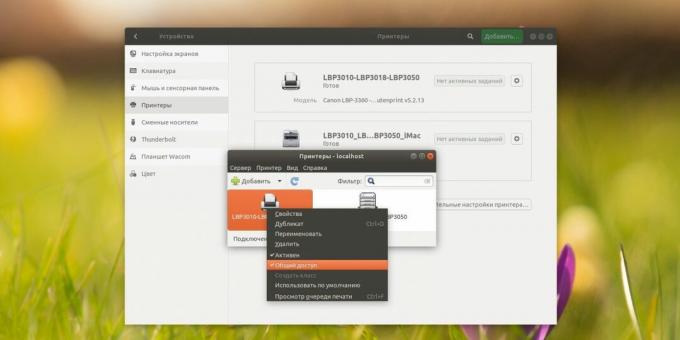
In the window that opens, right-click your printing device mouse click and enable the Sharing option.
Done. After all these manipulations, your printer will be available on the network.
Add a printer on another computer
Windows 10
Go to Settings → Devices → Printers & Scanners. Click Add Printer or Scanner. Windows 10 will find the option available on the network automatically.
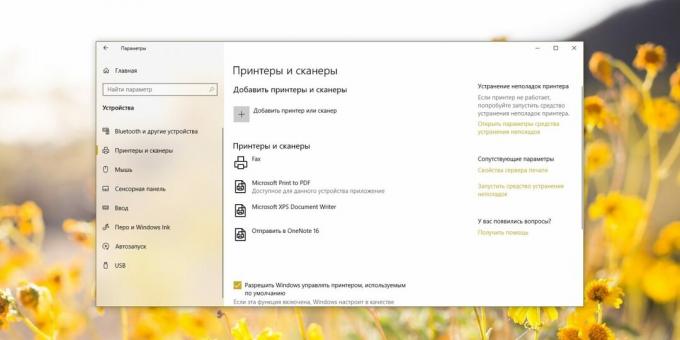
Click it and click "Add Device".
macOS
Go to "System Preferences" → "Printers & Scanners" and click on the plus button to add a printer. At the top, select the Windows partition. Don't be confused by this name, this is how macOS groups all printing devices on a local network, even those connected to Linux.
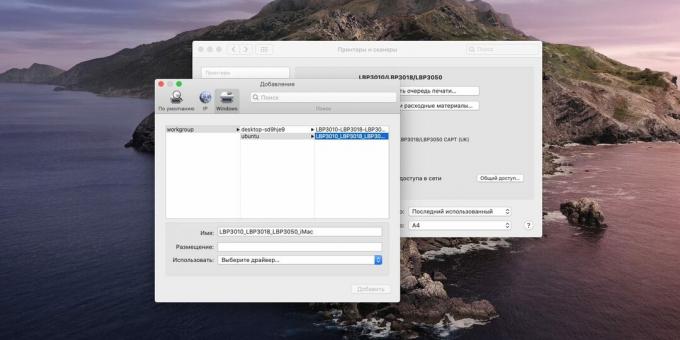
Select your workgroup (by default it is usually called Workgroup), name computerto which the printer is connected and the printer itself.
Select the appropriate driver from the drop-down menu below. To do this, you may need to go to the website of the manufacturer of your printing device, download the driver from there and install it. Then click Select Software and select the appropriate printer.
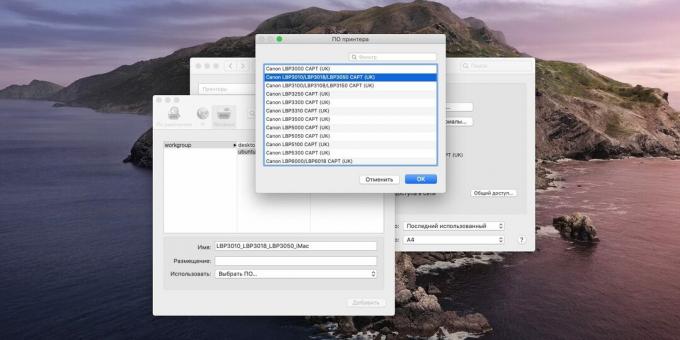
If the driver is not available, try the Universal PostScript Printer option - it works on many devices. Now click "Add" and the connection will be done.
Linux
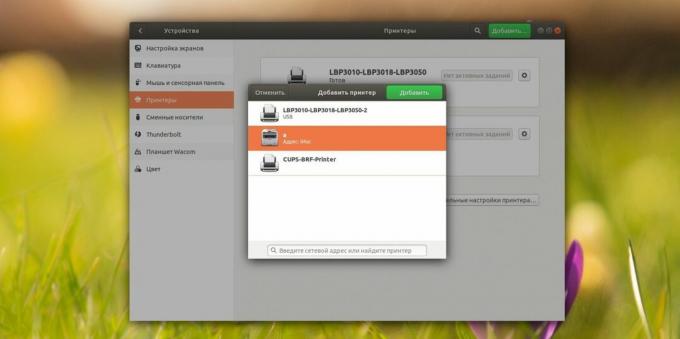
Go to Options → Devices → Printers and click the Add button. Select the desired one and click "Add" again.
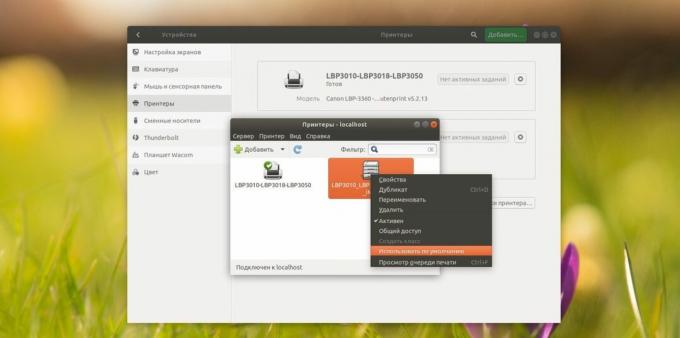
When the printer appears in the list, click Advanced Printer Settings. Right-click it in the window that appears and activate the "Use as default" option, then OK.
Now you can print from any desktop in your local network. The main thing is that at this time the printer and the computer to which it is connected are turned on.
Read also🧐
- 5 ways to save money on printing documents at home and in the office
- How to distribute the Internet from a computer via cable or Wi-Fi
- How to choose a printer for quality printing


