10 ways to make your own cat scratching post
Do It Yourself Educational Program / / December 28, 2020
How to make a scratching post out of cardboard with your own hands

What do you need
- Low carton (eg top of a shoe box);
- ruler or measuring tape;
- pen, felt-tip pen or pencil;
- thick cardboard;
- stationery knife;
- glue.
How to make a scratching post
Measure the length and width of the side of the box.

Mark a stripe on a separate piece of cardboard using your measurements.

Cut out the resulting part using a stationery knife.

Place this strip on the cardboard, circle and cut out. In the same way, prepare a few dozen more parts.

Glue the two strips together and insert into the box.
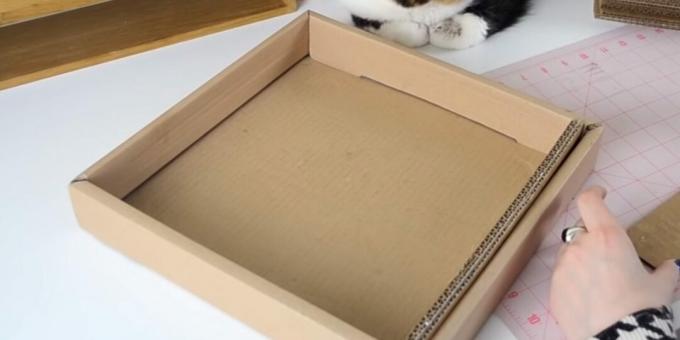
Grease the next strip with glue and attach to the previous ones. Continue to connect the parts in this way.

Fill the entire box with conjoined strips. For reliability, you can glue them to its bottom and walls.
What other options are there
Such a scratching post can be given an unusual shape, as in this master class:
Here they propose to make for cat cardboard tower:
The frame of this device is made of cardboard, and the surface for sharpening itself is made of thick rope:
Reading now🔥
- How to make a medical mask with your own hands
How to make a scratching post out of wood with your own hands

What do you need
- Sisal rope or jute;
- liquid dye for fabric - optional;
- wooden block;
- round piece of wood;
- felt-tip pen, pencil or pen;
- drill;
- paint for wood - optional;
- brush - optional;
- screws;
- hot gun;
- construction stapler;
- pom-poms and yarn is optional;
- bar top - optional.
How to make a scratching post
Give the rope a different color if desired, using the instructions on the dye package. In this workshop, the rope sections were painted in three different shades.
Place the block in the center of the round workpiece and trace.
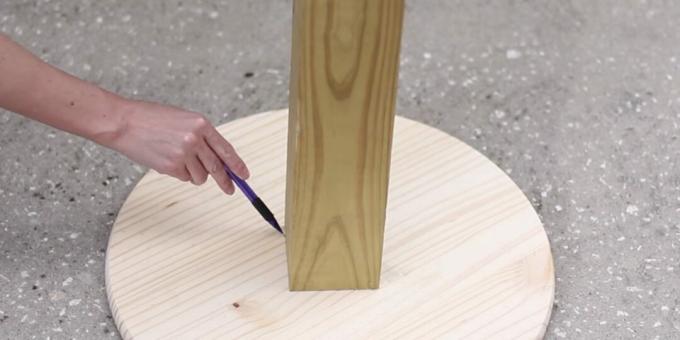
Divide the rectangle drawn in this way with two perpendicular lines. Inside, you will get four identical smaller figures. Divide them with diagonals - at the intersection of the lines there will be points where you need to screw the screws. Put the same marks on the base of the bar.
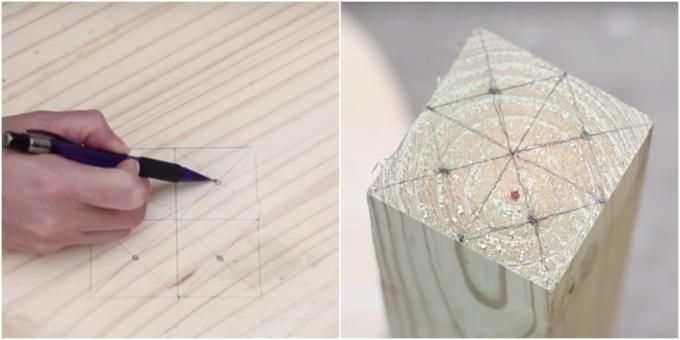
In place of these points, drill four holes on each part.

The round base can be painted without affecting the center of the workpiece.
On the reverse side, screw the block to the round piece with screws.

Place the future scratching post on the base. Glue sisal rope or jute underneath and secure the end with a construction stapler. Alternatively, you can screw in a screw.
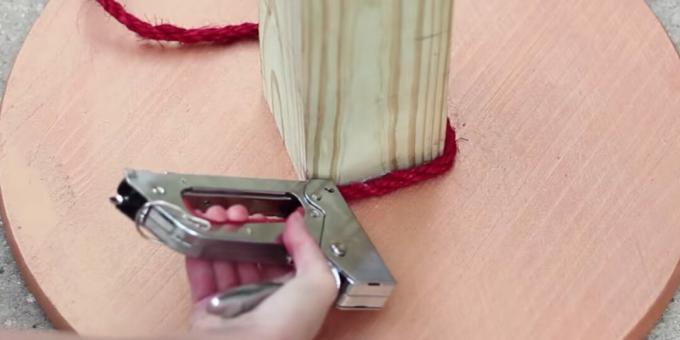
Wrap the timber with a rope, gluing it to the tree from all sides. If you change colored segments, fix the tip of each of them with a stapler.

When the surface for sharpening is done, you can also attach the pom-poms with threads and a beautiful top.
What other options are there
This scratching post is for cats similar to the previous one. Only the base is additionally trimmed with fabric, and a simple house from a small shelf is installed on top:
The authors of this video have made a removable scratching post that fits on upholstered furniture:
And here is the simplest option:
How to make a scratching post from a pipe with your own hands
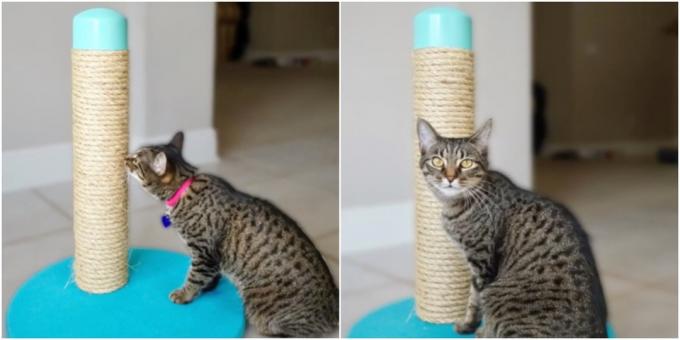
What do you need
- PVC pipe;
- a piece of wood;
- felt-tip pen, pencil or pen;
- round piece of wood;
- the cloth;
- scissors;
- glue spray;
- glue gun;
- jigsaw;
- drill;
- screws;
- sisal rope or jute;
- pipe plug;
- acetone - optional;
- rag or cotton pad - optional;
- spray paint is optional.
How to make a scratching post
Place the pipe on a piece of wood and circle the inside.

Trace a round piece on the fabric, leaving a few centimeters from the edges. Cut a circle out of fabric and glue it over the wood with fixing spray. Fix the sides and back with hot glue.

Using a jigsaw, cut out a round piece outlined on a piece of wood. Screw it to the round base with the screws. You can do it in the center or on the side.

Mark the points for the screws on the pipe, drill the holes and screw the pipe to the wood piece.
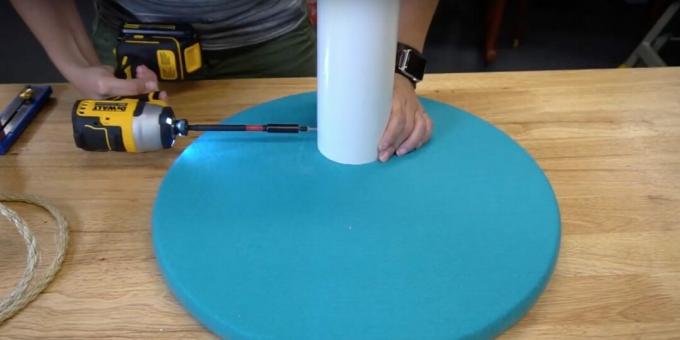
Slide the plug on top. The authors of the master class paint it with spray paint at the end. If you want to do the same, first wipe the plug with acetone.

Attach the end of the rope to the pipe with a glue gun.

Wrap the entire pipe up to the plug with a rope, periodically lubricating with hot glue.

If desired, remove the cap, paint, dry and re-fit the pipe.
What other options are there
The pipe can be attached to the base using metal corners, as in this video:
Read also🏠
- 15 ways to make a cozy cat house with your own hands
- 15 easy ways to make an unusual lamp with your own hands
- 15 ways to make your own bird feeder
- 20 cool DIY stuffed toys
- 25 very easy ways to make a coffee table yourself

