With the high resolution of the screen size of the text may be too small for the visually impaired. Increase font can cause eye strain.
How to increase the font in Windows
With utility (for any version of Windows, except for XP)
Using standard Windows tools for font settings is not always possible to achieve the desired result. While in most versions of the OS, you can only change the scale of the interface in general, third-party software allows you to configure the font of different elements of the system separately.
The utility System Font Size Changer you can enlarge the text in the window titles (title bar), the main menu of programs (Menu), message boxes (message box), the title bar (palette title), captions under shortcuts (icon) and tips (Tooltip). To customize each of these elements in the program have the appropriate sliders.
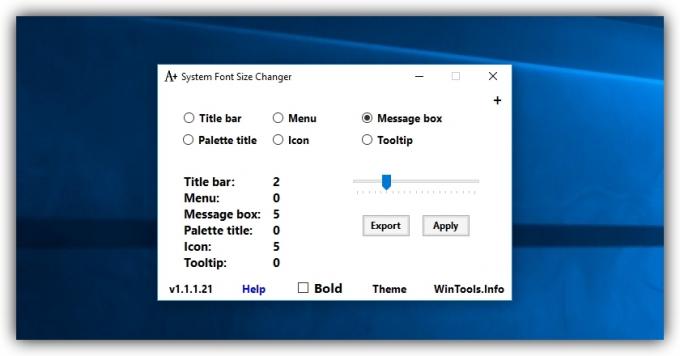
Export button to save the settings System Font Size Changer in a separate file. If after a crash or system reinstall the text will return to the default state, you can restore the specified size because of this file. It's enough to open it in "Explorer" and agree to the changes in the Windows registry.
System Font Size Changer →
With the default settings
If you do not want to install third-party software, you can always do the standard zoom settings.
In Windows 10
Right-click on the desktop and select "Display Settings." In the window that appears, expand the "Changing the size of text, applications, and other elements" and select any of the available zoom options. If none of them will not work, click "Custom Copy", enter the new size of the field (from 100 to 500%), and apply the changes.
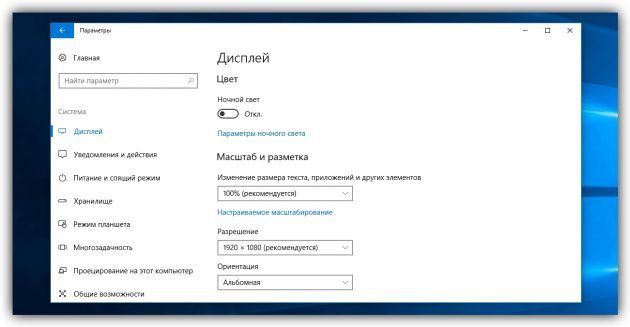
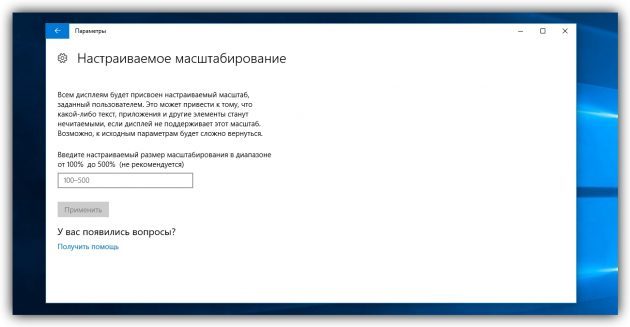
The scale of some elements of the design changes only after reboot.
In Windows 8
Right-click on the desktop and select "Screen Resolution." In the next window, click "Change the size of text and other elements." Then adjust the overall scale of all elements with a slider (or select an item, if it is not), or adjust the text size only selected items using the drop-down list. When finished, click "Apply".
In Windows 7
Go to "Start» → «Control Panel» → «Appearance and Personalization» → «Display" and select any of the available zoom options. If none of them will not work, left-click "Other font size" on the panel, select the desired zoom ratio, and then click OK.
In Windows Vista
Right-click on the desktop and select "Personalize." In the left pane of the window that opens, click "Change font size". Then select zoom in and click OK. If the proposed options do not suit you, click on "special scale" and set the appropriate value.
In Windows XP
Right-click on the desktop and select "Properties» → «Registration». In the "Font Size" select the option you want to increase and click OK.
How to increase the font in macOS
You can enlarge all the elements on the screen macOS change its permissions. To do this, go to the Apple menu, go to "System settings» → «Monitors" and check the box next to "scaled". Then, select a lower resolution, and confirm.
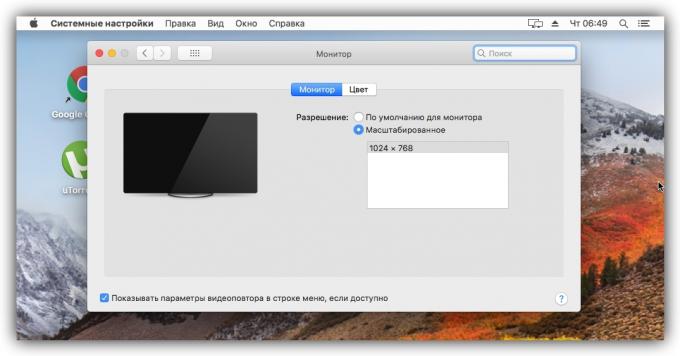
If you have a Retina-display, instead of resolution in the menu "Monitor" you will see options for scaling text. In this case, select the appropriate one.
You can also change the text size only to the individual interface elements. To customize the font for the icons on the desktop, minimize all applications, click "View» → «Show View Options" and select the size of the list of "text."
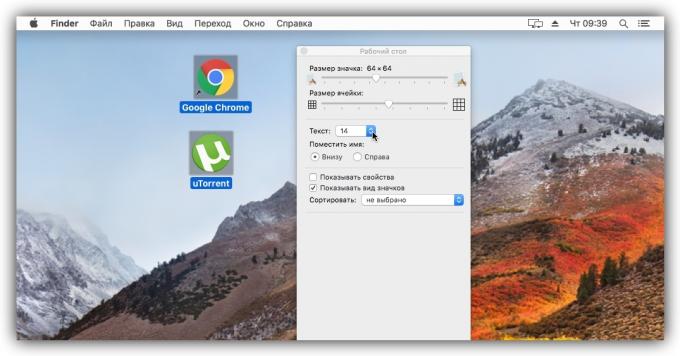
To change the font size for the icons in the Finder, do the same steps with an open Finder window on the screen.
To change the size of text and other elements on the side panels, open the Apple menu and go to "System settings» → «Basic." Select "Large" in the list "icon size in the sidebar."

see also
- How to put a password on a folder in Windows or MacOS →
- 7 tools for macOS and Windows, which will take care of your vision →
- Windows hot keys and macOS that will simplify your life →


