How to quickly decorate the house: 14 ideas for homemade garlands and toys
Do It Yourself Printers / / December 19, 2019
It is not too late to create a Christmas mood at home or in the office. Ornaments can not buy, and make available tools: paper, cotton, and even orange peel. We have prepared instructions with Canon.
Fairy lights
1. Garland of snowflakes

What do you need
- A4 paper.
- templates snowflakes.
- a printer.
- Thread or fishing line.
- Glue.
- Scissors and stationery knife.
How to do
Print patterns of snowflakes on the printer, cut out the circle and fold it four times - get 1/12 of the circle. Carefully cut along the contour snowflakes. Expand the workpiece and flatten them to iron. By using adhesive or double-sided tape to attach their thread. Hang the chandelier on, curtains or window.
2. Christmas ballerina
This garland can be self-sufficient decoration for windows or curtains, as well as an additional figure for garland from snowflakes. Simply replace in some places ordinary snowflakes on dancers and secure them with glue or double-sided tape.

What do you need
- A4 paper.
- templates snowflakes.
- templates dancers.
- a printer.
- Thread or fishing line.
- Scissors.
- Glue.
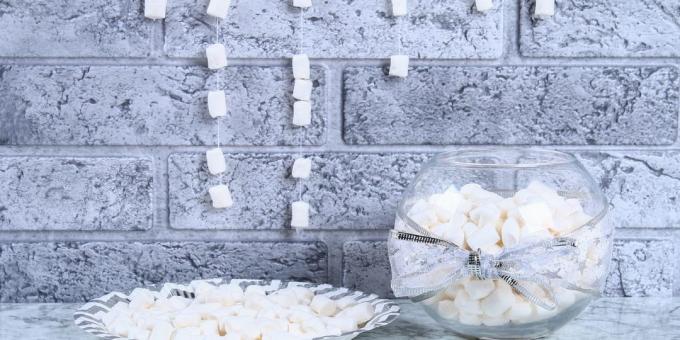
3. Garland of marshmallow or cotton
What do you need
- Lesko.
- Needle.
- Marshmallow or candy.
How to do
Prepare the line: Cut the desired length, thread a needle and make a knot at the end. Place the marshmallow on the line and spread over the entire length. This garland can be done with cotton wool. To do this, create balls of different sizes, being careful not to crush the cotton, so that it remains air. Then fix them with glue or double sided tape on the fishing line and hang vertically so that beads were floating in the air.
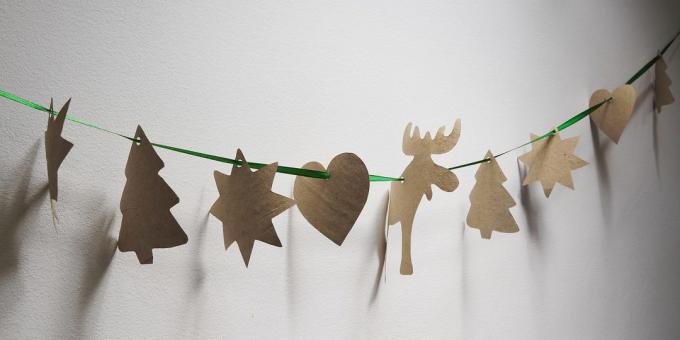
4. Garland of figures and pine branches
What do you need
- Thick or kraft paper.
- Templates figures for print.
- a printer.
- Sprigs of pine cones.
- Twine or ribbon.
- Decorative clothespins.
- Scissors.
- Hole puncher.
How to do
Print and cut out the figures of templates. Use the hole punch make holes in them and thread the tape. Distribute toys for the entire length of the tape and secure the garland of twigs and pine cones.
To create even more comfort, secure family photos and memorable events of the year on a garland decorative clothespins. This technique works in the office: You can print photos together colleagues, strenuous work and a crazy corporate and December 29 to take stock of the year and spend it under the champagne.
5. Christmas garland-lanterns

What do you need
- A4 paper.
- templates figures.
- Scissors.
- Glue stick.
- Double sided tape.
- Thread or fishing line.
- a printer.
How to do
- Print the template and cut out the figures on a path. To garlands need 24 parts lanterns each species and 126 sprockets.
- To make a three-dimensional toy, take one piece torch and brush one side with glue. Glue it to the same item. A flashlight should consist of six equal parts. When the remaining one piece, make a small loop of string and attach it to the glue. Collar need to hang toys on the line. Then glue the first and sixth parts toys. Repeat the same with the other parts of the lanterns. All you'll have eight lanterns - four of each kind.
- Along the same lines make 21 three-dimensional asterisk, but not bond the first and sixth parts. Before doing so, pull the line through the three stars and make a loop. After that bond the parts.
- Now pull the thread through all loops, to get the garland.
6. Garland of orange peel


What do you need
- Orange peel.
- Cookie cutters.
- Needle with thread.
- Iron.
- Thick paper or cloth.
How to do
Using molds cut from orange peel figures. Flatten them iron, enclosed under a cloth or paper (not to burn the figures and not damage the iron). With a needle make a hole and thread the toys. Garland is possible to further decorate ribbon, pine branches and buds.
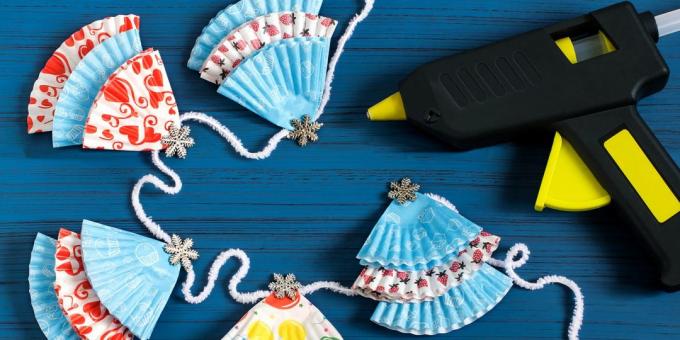
7. Garland of paper tartlets
What do you need
- Colored paper tartlet.
- Glue.
- Sequins in the shape of stars.
- Twine or ribbon.
- Scotch.
How to do
Fold the paper mold so that a triangle. Lubricate the upper corners of the triangles with glue and apply them to each other to form a Christmas tree. Decorate with sequins toys (you can cut out of colored cardboard). Then glue the tape to the Christmas trees twine or ribbon.
Cards and packaging
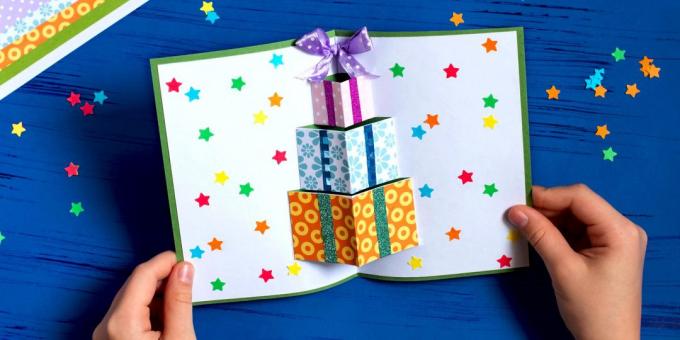
8. Bulk Christmas card
Give cards to colleagues, partners and family - it is rather a formality than a manifestation of attention. But if you make a postcard with your hands, then the value of the gift immediately increase.
What do you need
- Two sheets of cardboard or heavy paper A5.
- Gift paper (you can take the colored wrappers).
- Template for print.
- Printer, printing on thick paper.
- Glue stick.
- Scissors.
- Tape.
How to do
- Print the template on the printer and make cuts on the dotted line. Bend the rectangles to create the volume.
- From wrapping paper cut rectangles of the same size and mount them on the projecting parts.
- Cut six long, thin rectangles of colored paper - it will be bows on gift boxes. Stick them and let them dry.
- Connect the blank with a solid green sheet of cardboard. Glue bow.
- Sign the card and decorate with white background colored asterisks.
The same card can be done with volume herringbone. The template can be downloaded to print here.
9. Reindeer
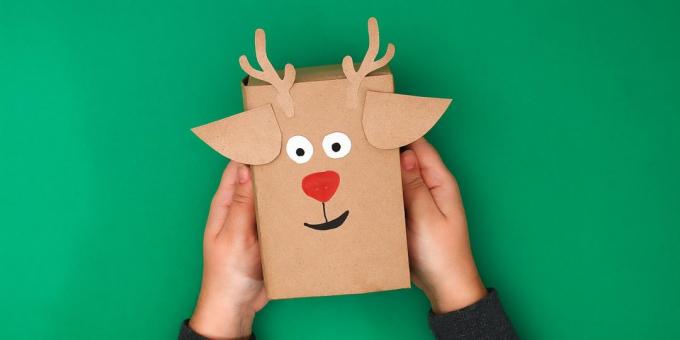
What do you need
- Colored office paper or kraft paper.
- Scissors.
- Glue stick.
- Template for print.
- Color printer.
How to do
Pack a box with a gift in kraft or colored paper. Download a template to print, cut and paste the details on the box.
10. yarn nose
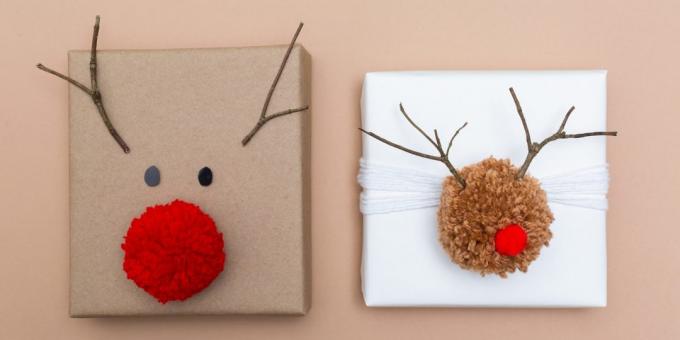
What do you need
- Kraft paper.
- Black cardboard.
- Yarn.
- Dry twigs.
- Scissors.
- Super glue.
How to do
Pack a box in kraft paper. Schedule, where there will be eyes and horns. From cardboard cut out of black eyes and carefully glue them on the box. Then, attach the horns of twigs. The hardest part - making pompoms, but in fact, and it is quite simple: the wound yarn on two fingers, and tie a prune. To make it clearer, watch the video.
The resulting paste pompom to the box - the original packaging is ready.
Christmas decorations
11. Angel from a paper plate

What do you need
- The white paper plate.
- Disposable plastic spoon.
- Blue paint.
- Yellow colored paper.
- Wire.
- Tinsel.
- Black marker.
- Scissors.
- PVA glue or double sided tape.
How to do
- Paint tray with blue paint and let dry. Then cut it into three parts, so that one was smaller than the other two. This will be the body of angels. The other two parts - fenders.
- Take the angel's body and glue the wings on the reverse side. If the plate is smooth and keeps the adhesive - use double sided tape.
- Along the trunk stick spoon. The convex side must be to the front of the toy - it will be a little angel face.
- From colored paper cut two small clouds - one more, another less. Glue them to the spoon: large clouds on the reverse side, a smaller - from the front, to the convex part of spoon.
- Draw on eyes and mouth with a spoon.
- Wire make a halo, wrap the tinsel and attach to the spoon.
12. Snowman
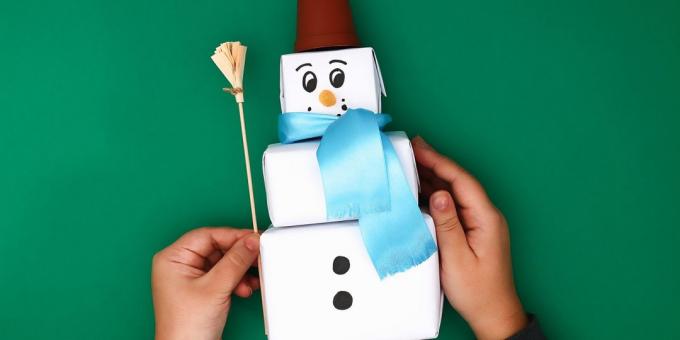
What do you need
- Heavy paper or thin cardboard.
- Orange and beige colored paper.
- Hunter's match.
- Toy bucket (can be replaced by a brown colored paper).
- Blue Ribbon.
- Scissors.
- PVA glue or double sided tape.
How to do
1. Cut three templates scheme. Fold along the lines and glue. You should have three different sizes of the parallelepiped.
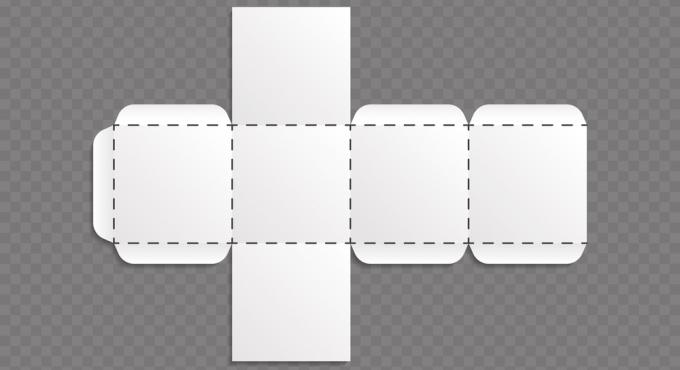
2. Connect the parts with each other and draw on the buttons of the body, mouth and eyes.
3. Of orange construction paper make a nose-carrot: cut a small square and roll it into a cone, and then paste.
4. Hunting a match stick to the body and make the bars of a beige colored paper.
5. Attach a bucket in the head and around the neck tie a bow of blue ribbon.
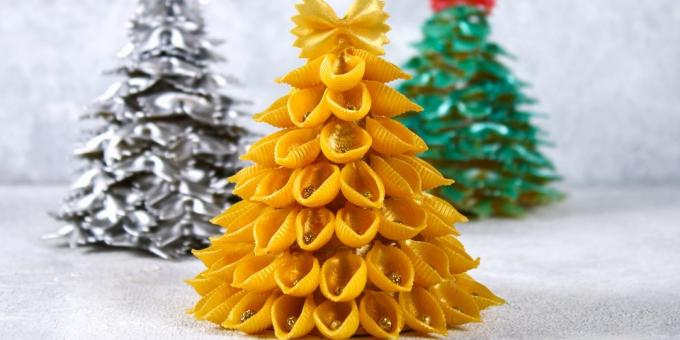
13. Christmas trees pasta
What do you need
- Pasta-shells.
- Pasta-bows.
- Cardboard.
- Spray paint (gold, silver, green).
- Red lacquer.
- PVA glue or superglue.
- Glue gun (you can not).
How to do
- From the square cardboard sheet do cone. Vary the size of the workpiece, depending on what size Christmas tree you want to get.
- Cone check the distance between the rows of shells to toy turned out neat.
- Glue the shells, since the lower row, and fasten on top of the bow. Leave for a few hours to detail frozen.
- Cover the toy paint, red lacquer to highlight the bow.
14. Volume toy made of paper

What do you need
- Colored paper.
- Scissors.
- Glue stick or PVA.
- Thread or twine.
How to do
- Cut out of colored paper six or eight (to be voluminous) circles of the same size. Optionally, you can make a one-color or multi-colored toy.
- Fold the circle in half colored side inwards and glue the halves together.
- When the remaining one circle, form a loop of thread and attach it to the inside of the toy, and then stick the last detail.
According to this principle can make toys of different forms: in the form of stars, ovals or firs.


