19/12/2019

On your keyboard may be more bacteria than a toilet seat. Get rid of them, but at the same time dust, dirt and spilled coffee, not so difficult.
Once a month it is necessary to carry out surface cleaning. It will eliminate the dust and crumbs (for those who like to chew something delicious in front of the monitor).
Turn and shake the little keyboard. Part of the garbage will disappear at this stage.
Take a small brush or brush for drawing and whisk dust and crumbs stuck between the keys.
Get rid of dust in hard to reach places, you can use a special USB-vacuum cleaner for keyboards or can of compressed air, which are sold in stores and digital home appliances (office cleaning funds). Suitable and normal hair, but only if the keys sit tight and there is no probability that the garbage just clogged deeper.
Purging keypad can only cool air.
To remove the fat from the keys, go over them with a paper towel or microfiber.
When preventive cleaning in any case can not be used with wet rags, inside the keyboard does not get liquid. Maximum - wet wipes for your computer.
Every three months you need to take apart and wash keyboard. The same will have to do if you spilled something on it.
This method is suitable for cleaning integrated notebook keyboard.
Remove the key. button usually attached with latches. They are easy to pull the clip, a flat screwdriver or a knife, starting from the lateral edges keys. It should be done very carefully, because the plastic is thin and easily damaged.
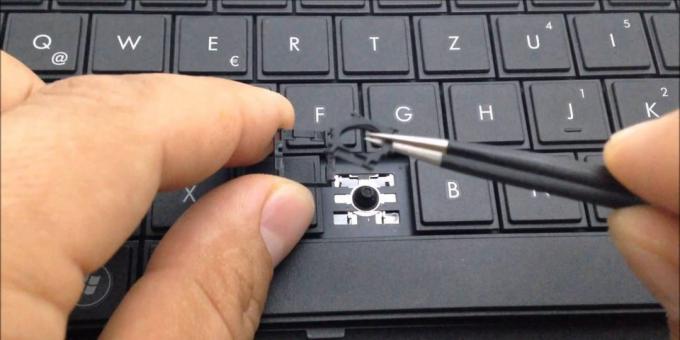
Pay particular attention to the long keys such as Shift, Enter, and space. Usually they are attached metal clamps, so remove and re-record them harder. If not confident in their abilities, it is better not to touch them. On some laptops, such a possibility is not provided at all.
Clean the mounting location. Walk along the seams of flannel cloth, a damp cloth or paper towel. Keyboard can be purged from the interior of spray with compressed air or cold dryer.
Do not forget to take a picture of the keyboard before dismantling.
Rinse the keys with plain water, soap and water or antiseptic. Alternative: put all the keys into a clean sock, tie it, soak in detergent, and then hold it under running water.
Dry keys. If you do not want to wait until the moisture evaporates, use a hairdryer.
First, fix the big key, then all the others. There will be so helpful a photo you've done before cleaning.
Take a picture of the keyboard, and then flip it and unscrew the screws with a screwdriver. Open the device and place both halves on the table inside facing upwards.

The lower part can be put aside, because they do not have to clean it.
Gently squeeze out the keys. Note the space and Shift, are to be additionally secured with metal pins. Enter key not remove: usually she is very difficult fixture, so to put it back is very difficult.

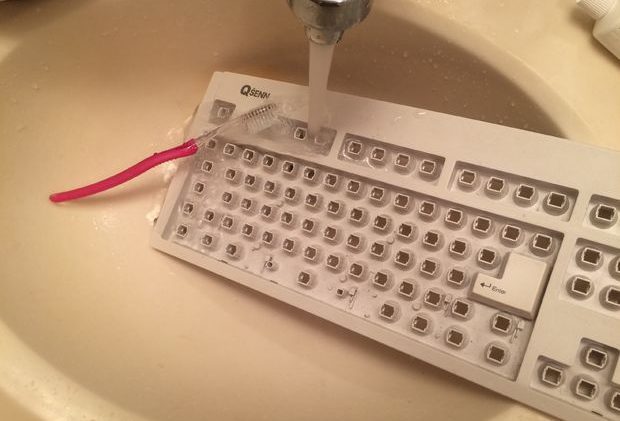
Combine all of the keys into the sink and rinse in running water or to leave time in the disinfectant solution. If the plastic is deeply stained, go over it with a soft toothbrush. Then dry the keys.
Rinse the top of the keyboard under running water, removing toothbrush pollution, especially in corners and junctions. Then let it dry.
Secure the key in the initial position. If clicking hear a click, everything is in order: the button firmly entrenched.
Connect the upper and lower part of the keyboard, tighten the screws.
Connect the device to computer and make sure that all the keys are working.
A keyboard on which shed water, hot coffee or any other beverage immediately invert and shake well. Wipe with a dry cloth.
Leave overnight to dry out keyboard. If the next day some keys sticks or not using the first or second method of cleaning.