How to install a bath with his hands
Do It Yourself Educational Program / / December 19, 2019
1. Prepare tools and materials
This is what is needed for the installation:
- bath;
- legs;
- mounting kit;
- drain valves;
- plugs;
- screws;
- silicone sealant;
- metal profiles;
- polyurethane foam;
- White Spirit;
- wooden blocks;
- bricks;
- cement;
- spanners;
- roulette;
- level;
- pencil;
- drill;
- drill;
- hacksaw.
2. Install legs
The first step is mounted legs, which usually are included. For this bath turned upside down without removing the packaging from the sides, and collect the brackets according to the instructions. Depending on the legs of the bath material and fixing different.
acrylic bathtub
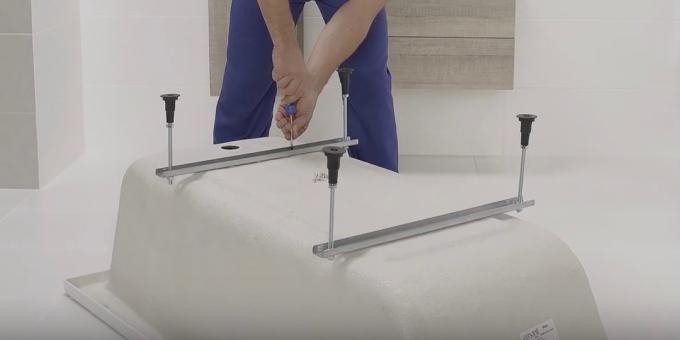
In these baths at the bottom there is a special insert amplifier made of plywood, on which screws are attached mounting plate and have them are screwed threaded rods legs.
Need to partition fixing points in accordance with the instruction, and then drill holes for screws at said depth and wrap them with a screwdriver. In order not to make a hole through the bath, use only screws, complete with calculated length.
steel bath
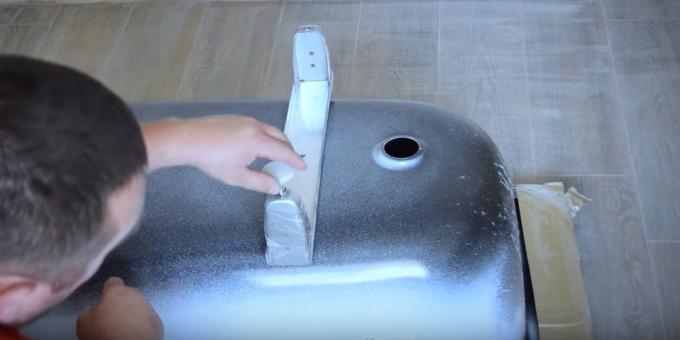
Analogs of steel equipped with a pair-lodgements poles that stick to the double sided tape and are pressed weighing bath. Another option fasteners - four separate legs, fixed on special hooks on the bottom.
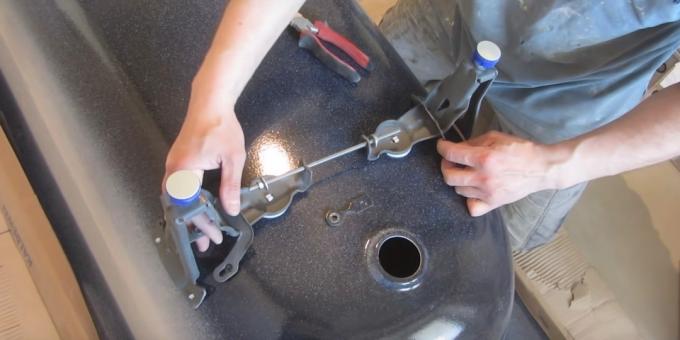
In the first case it is necessary to degrease the surface with mineral spirits or other solvent and stick support. In the second - to put the legs on hooks and pull them together by pins and nuts.
cast iron bathtub
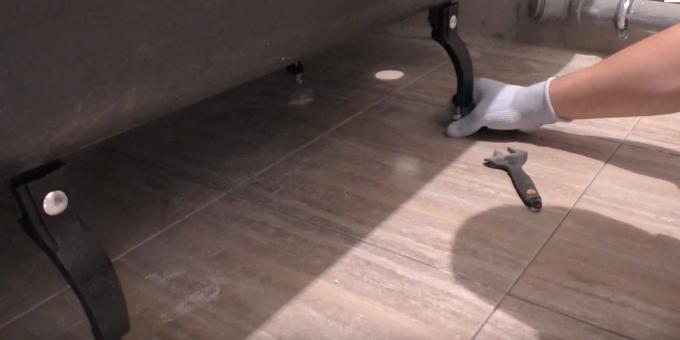
Cast-iron bowls also have four separate legs that attach to a specially molded in the bottom of the protrusions with the holes for the bolts.
To install, align the legs with protrusions to fix them with nuts and bolts to tighten with a wrench.
3. Assemble the drain valves
The siphon and overflow system have the same structure, regardless the bath type. Typically, the fitting is supplied with it. Otherwise, you need to immediately purchase the missing product in the store.
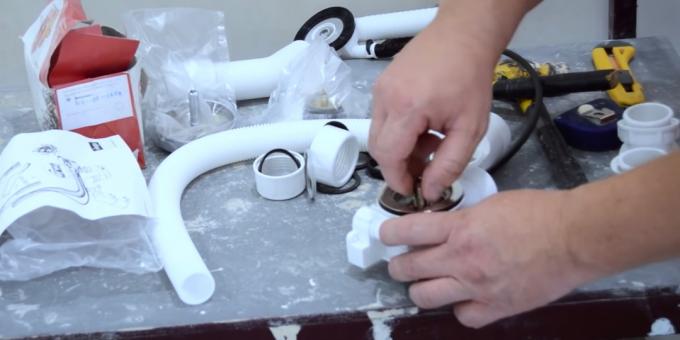
Examine the assembly diagrams specified in the instructions. Place the tubes in their places and screw union nuts after setting all connections sealing rings. Further siphon is put on the rubber gasket and the entire structure is pressed against the drain screw through the protective grille.
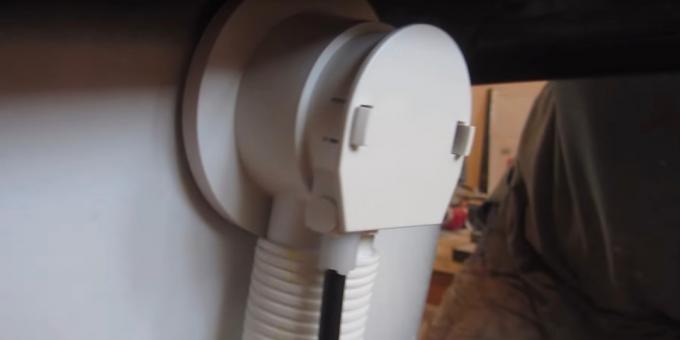
In the same way the upper pipe is secured to the overflow opening on the bathtub. If the siphon is the drain valve, and not an ordinary plug on a chain, then the overflow grate is installed rotary handle according to the assembly instructions.
4. Try and set a bath
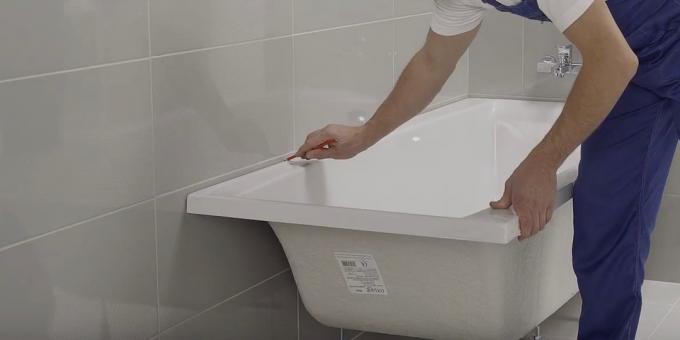
After installation of the drain fittings bath ready for installation. But before it is finally fixed, it is necessary to align the product and mark the boundary side of the wall for subsequent mounting.
To do this, move the bath in its place and, by adjusting the feet, check with a spirit level horizontal position. No bias towards the drain do not need: they are already provided by the manufacturer.
The height of the bath is selected on the spot. Typically, the distance from the top side to the finished floor is approximately 60 cm. The main thing that was above the siphon bell sewer 3-5 cm, otherwise will quickly drain clog.
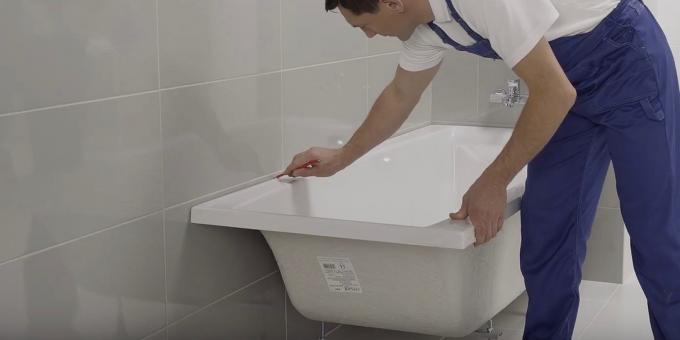
After the pre-alignment on the sides of the wall need to hold a pencil line. This mark is useful for mounting the wall brackets and supports.
5. Mount the wall fixture
Massive cast iron bathtub confidently stand on the legs and do not require additional fixation. But the lungs of steel and in particular for acrylic Reliability also attached to the wall.
Acrylic and steel baths
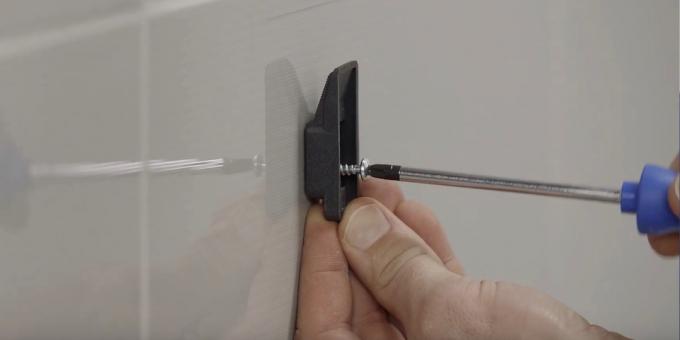
These baths are often fixed bracket in the form of hooks on which hung the cup. Also used improvised stops of metal profile for drywall, perform the same function.
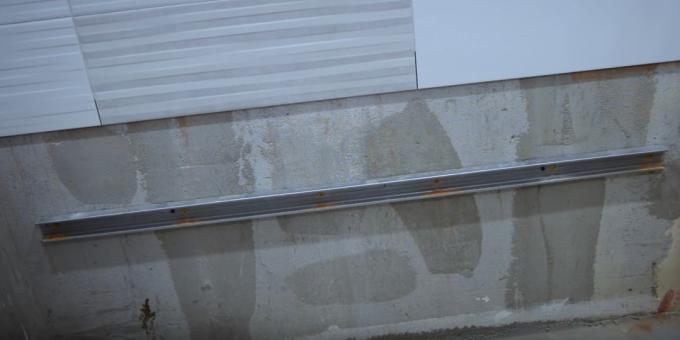
In both cases, the attachment mounted on the dowels, which are under the drilled holes. Using bath top line, mark holes abutments so as to be strictly below the edge bead and uniformly distributed load.
cast iron bathtub
Articles of iron weigh from 80 to 200 kg, however are securely and do not need additional fastening.
6. Install mortgages
If the bath is supplied with factory-screen in the set, then all the necessary fasteners is already provided in the structure. If not - will have to be mounted in the front aboard mortgages, which then joins the screen frame.
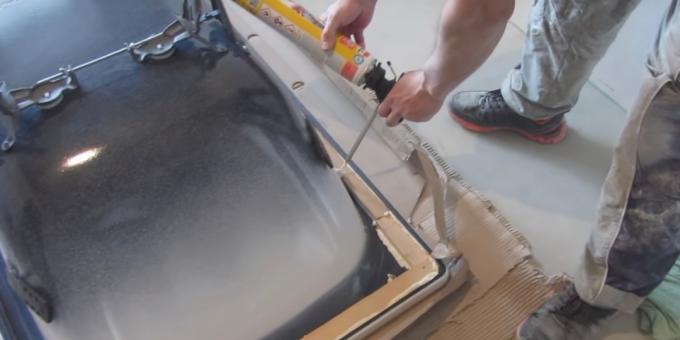
To do this, cut a piece of a piece of wood and glue it to the inside of the side to silicone sealant or assembly foam. If the bowl is not adjacent to three walls, but only two - one more bar should be fixed and one of the free sides.
Some of acrylic baths are already ready mortgages in the form of timber pieces on the sides of the perimeter. If you see such piece of wood, then you can do without additional inserts.
7. Make insulation
Acrylic and cast iron bathtubs retain heat well and do not need a layer of thermal insulation. Steel, on the other hand, quickly cool down and also very noisy when typing water. Therefore such baths prior to installation on the bottom and walls of assembly foam is applied, sprayed insulation or automotive sound insulation.
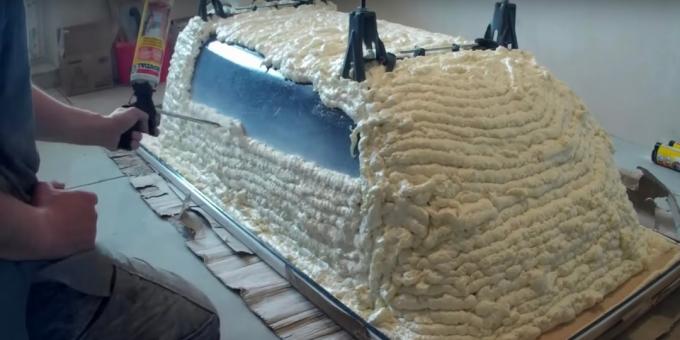
For this inverted bath, wiped with a damp cloth and harboring foam snake moving upwards. Average consumption on one side of the cylinder is 2-3. Setting time peny- 3-4 hours. You can then install the bath.
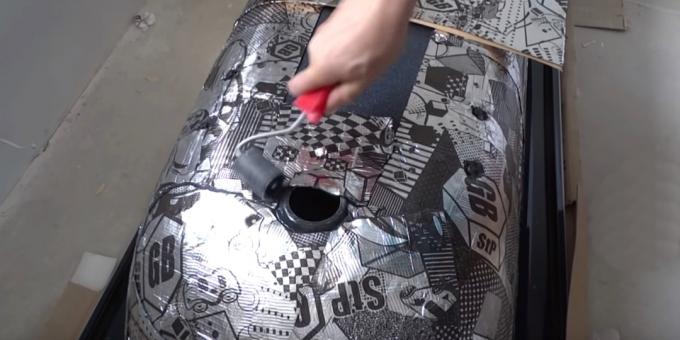
Sometimes, before the application of insulation bath pre okleivayut automotive sound insulation. The surface solvent degreased and then with adhesive base sheet is removed the protective film. After warm hairdryer construction insulation is glued to the bottom and walls of the bath, and then rolled with a roller.
8. Place the bath in place and secure
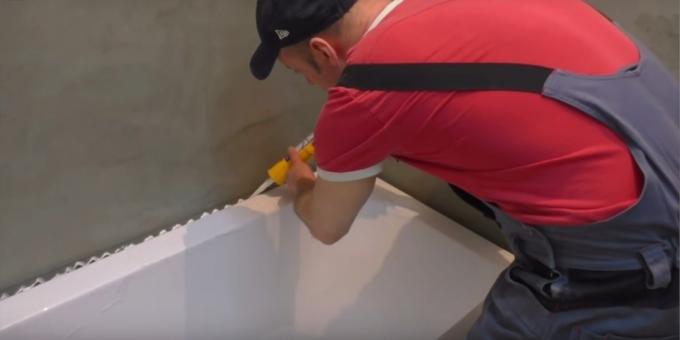
Now we can finally establish the bath in the appropriate place and secure with the option selected fixture and seal the joint with the wall.
For this purpose the wall just below the line marked previously applied bead snake silicone sealant. Then the bath is pushed gently into place. Adjacent to the side walls are placed on fixed brackets or stops from the profile. Bowl pressed for a snug fit so that the sealant squeeze out slightly.
9. Plumbed
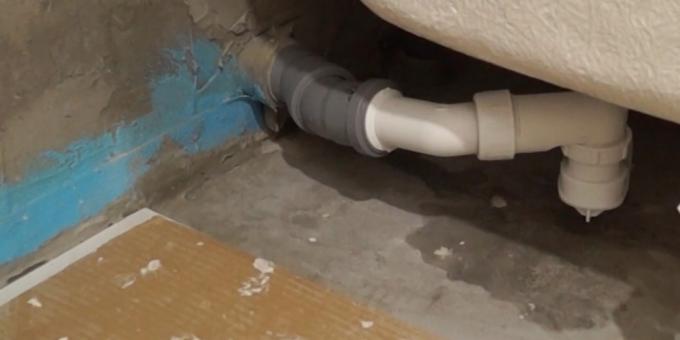
After installing the bath siphon connected to the socket sewerage via corrugation or rigid pipe with corner fittings. The latter option is preferable: on the smooth tubes much less accumulated dirt.
Sealing fittings gum was treated with special grease or conventional detergent, then simply connected to each other. If there is any doubt about their quality, the joints for the loyalty you can miss the mark with silicone sealant. But note that dismantle them in case of replacement will not be easy.
Do not forget the need for good drainage slope! The siphon must be above the sewer entrance to 3-5 cm. With a smaller drop water will drain, but because of the blockage of plums have to be cleaned more often.
10. Make a booster cushion
Cast iron bathtubs have sufficient rigidity, while the lightweight acrylic and steel can slightly bend under the heavy weight. Although manufacturers allow the installation only on legs, for greater reliability under many masters equip such base cups booster cushion of brick or gazoblokov.
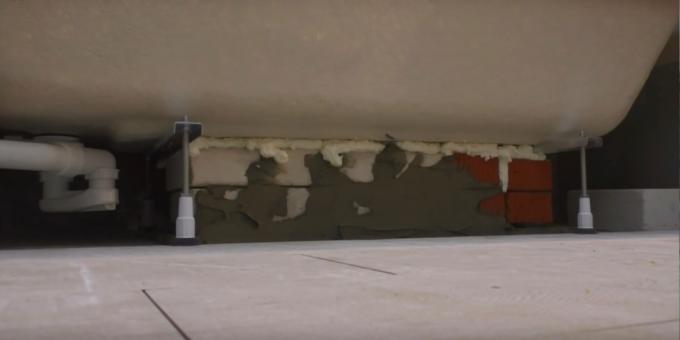
To do this, dial a full bath of water. Then the floor slightly wetted, under the bottom of stacked bricks or aerocrete. K between the floor and they are mounted on a cement slurry. From the top to the bath pillow should be about 5-7 mm - this space is filled with foam. If the layer is more, over time it can prosest and support will no longer work.
Full hardening foam takes about a day. All this time the bath should be with water, otherwise the foam during expansion can lift the cup.
11. Make sure there are no leaks

As long as the space under the bath screen is not closed, you need to check all connections for leaks and eliminate any leaks. To do this, a siphon under podstelit newspaper, open and descent until the water is drained, make sure everything is dry. If any of the compounds digs, just need to tighten it.
12. Fit the screen
After the screen closes the completion of the space under the bath. It can be complete finished decorative panel, the purchase versatile screen, PVC panels and tiles on plasterboard, mounted on the frame.
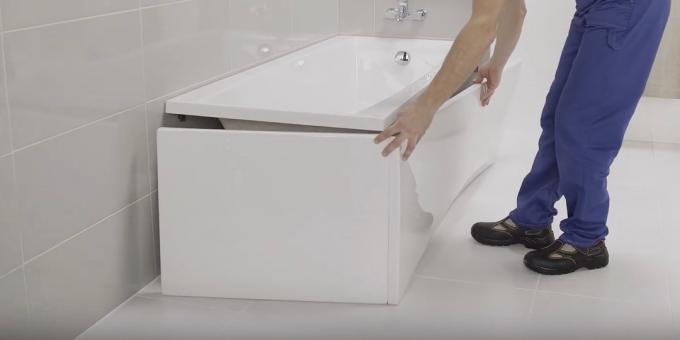
Serial screen is attached to the walls and sides by snap like bath: mark out holes for fasteners according to the scheme in manual and fixed to the dowels. Then the screen is put on the hooks and hold them.
For home-made versions previously erected frame of timber or metal profiles. The upper part of the frame is attached to the wooden boards mortgages, lower - on plugs or silicone sealant to the floor. Further, the rack installed between increments of 40-50 cm.
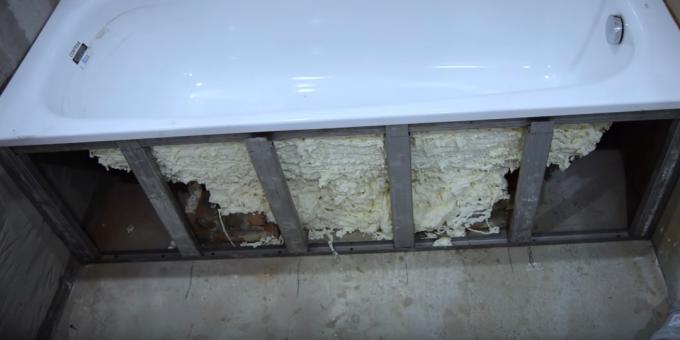
When tiling frame previously sheathed moisture resistant plasterboard sheets. The screen is made of PVC panels, and other linear materials is attached directly to the frame.
If the screen is not removable, it is necessary to establish in the siphon area inspection door for maintenance. It is important to position the window so that access to it does not overlap, for example, a pedestal sink.
13. Arrange seam side of the contour
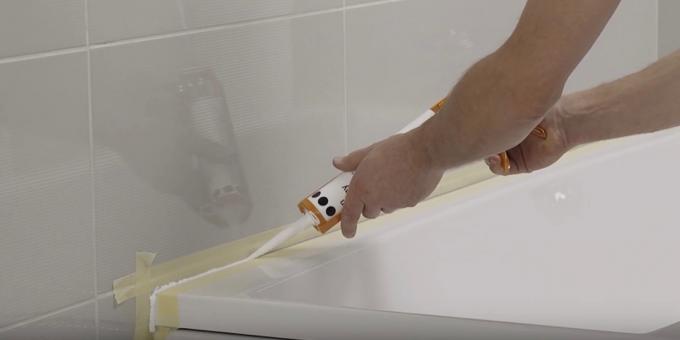
The final touch to the installation of a bath - sealing of joints with silicone sealant. Better choose white color composition in the bath. Transparent will not look very neat.
Apply a sealant layer on the bath circuit, then lubricate soap side wall and to the alignment silicone is not smeared. Surplus removed with a spatula or a special plastic card with a notched corner.
see also🧐
- Which bath to choose, so that you do not regret
- How to quickly clean the bath without damaging it
- What you need to consider everything for the perfect bathroom
- How do I transfer window in winter mode and get rid of drafts
- How to choose a warm floor and mount it properly

